
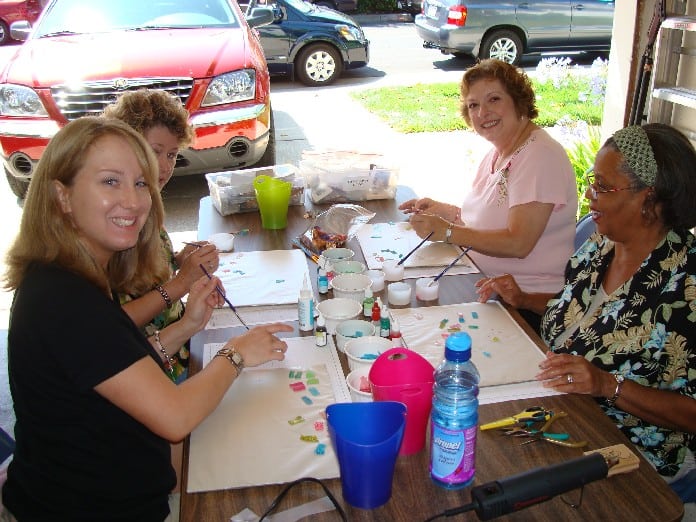
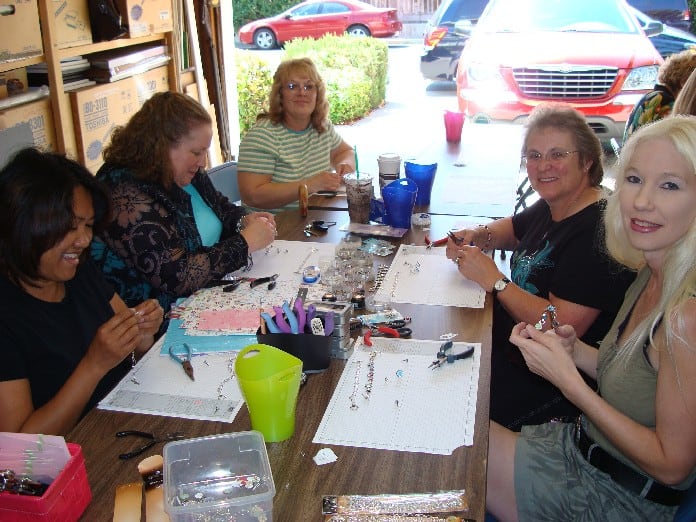
We had the MOST fun on Saturday… working on our Faux Seaglass bracelets… of course.. yes.. this is another SHARON IDEA! 🙂 She helped me lead the class with instructions of how to make the faux seaglass pieces from Shrink Plastic!!
Oh ya, did I mention there was chocolate?
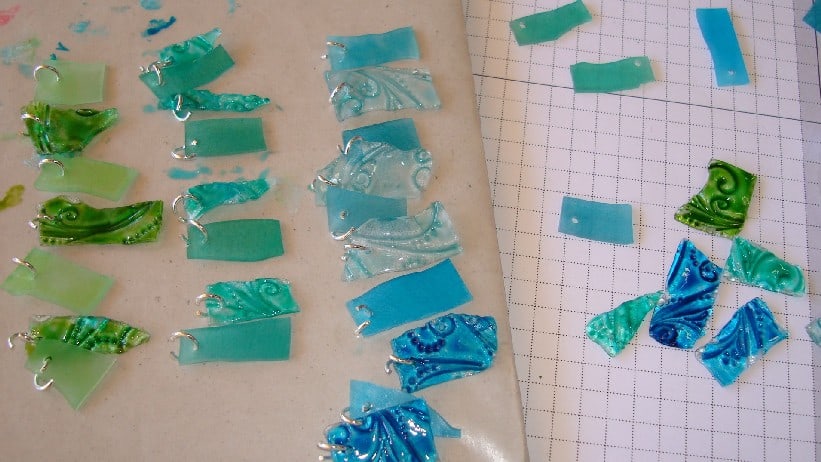
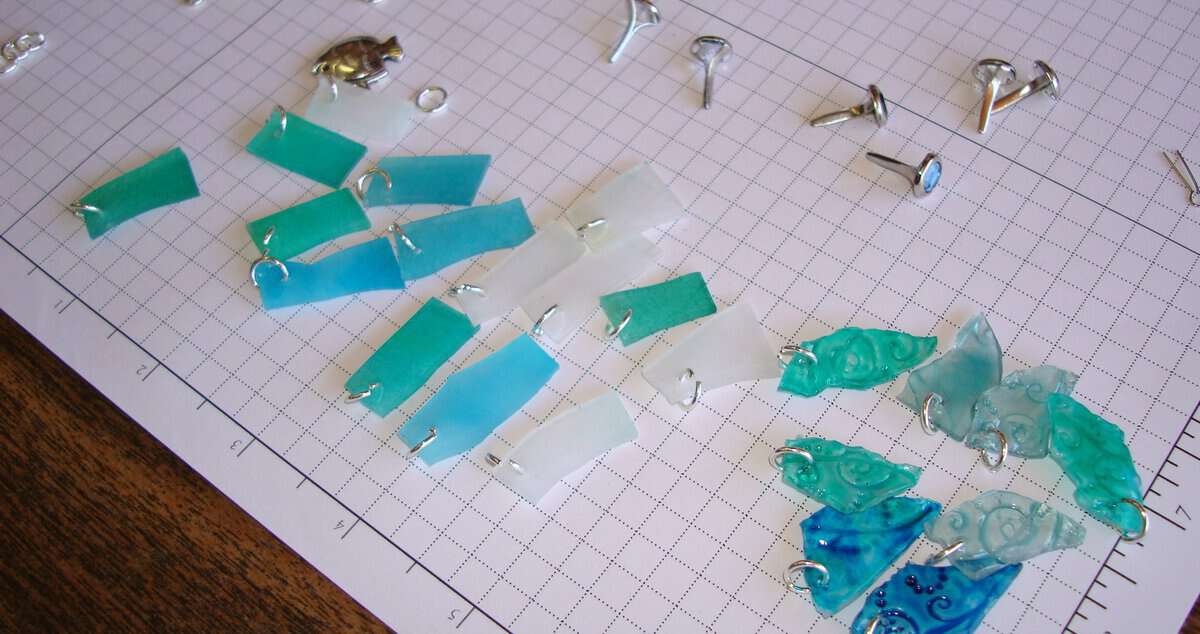
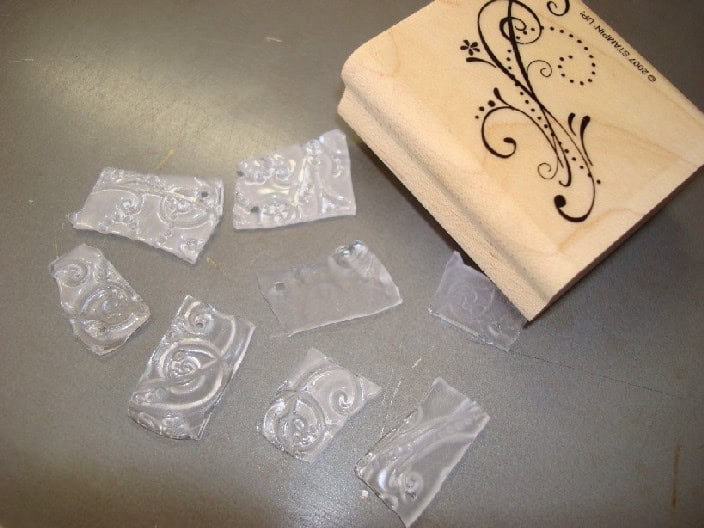
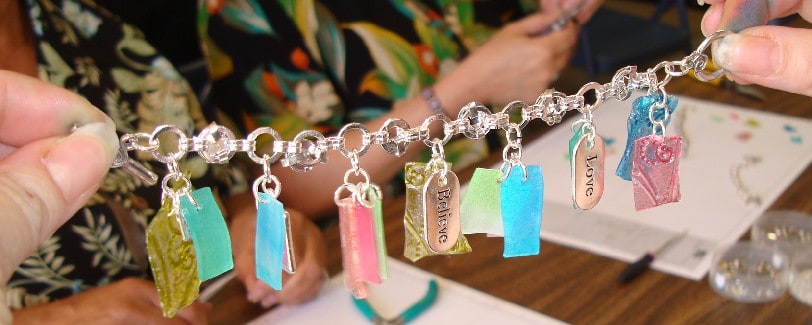
To aid in making the class a little quicker, I preshrunk and colored about 300 pieces for them to use, and they created the ones with the swirl impressions in class:
Rip the shrink plastic into pieces approx. 1-1/2″x3″ and punch a hole with the large hole of the Crop A Dile, then shrink it with the heat tool. While it’s still hot, impress a swirly stamp into it (we used the swirls from Priceless).
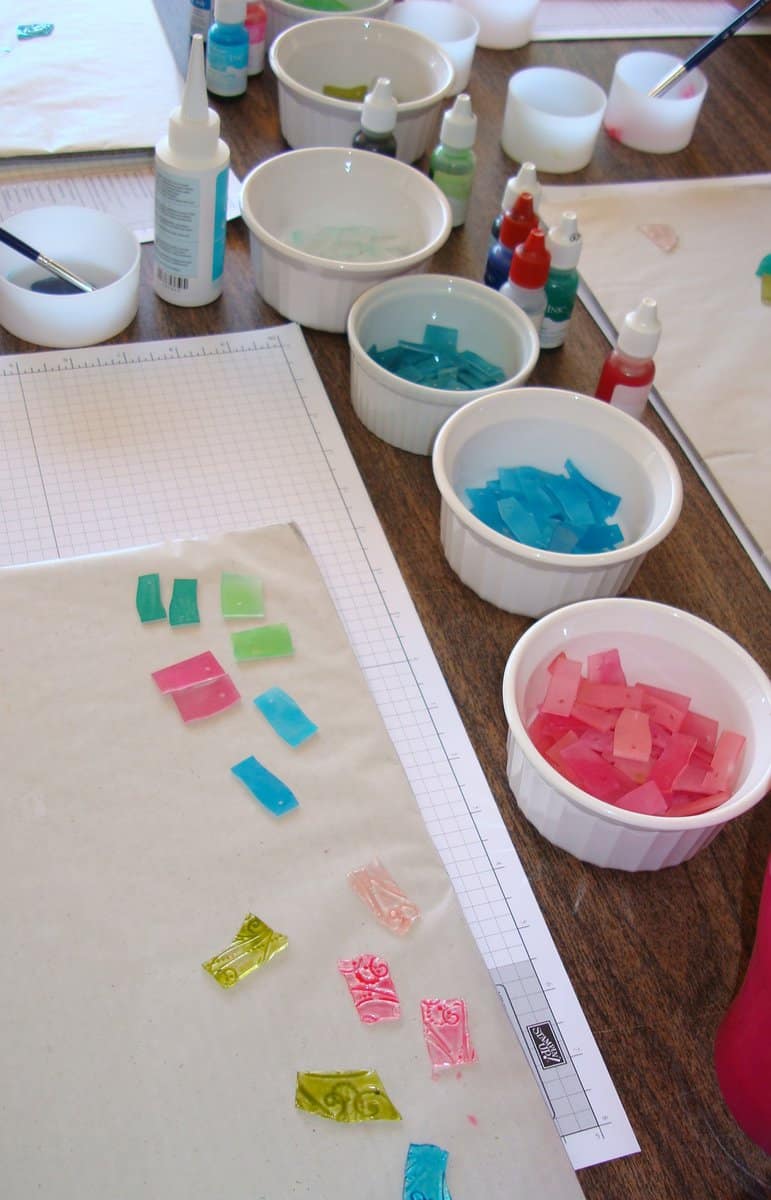
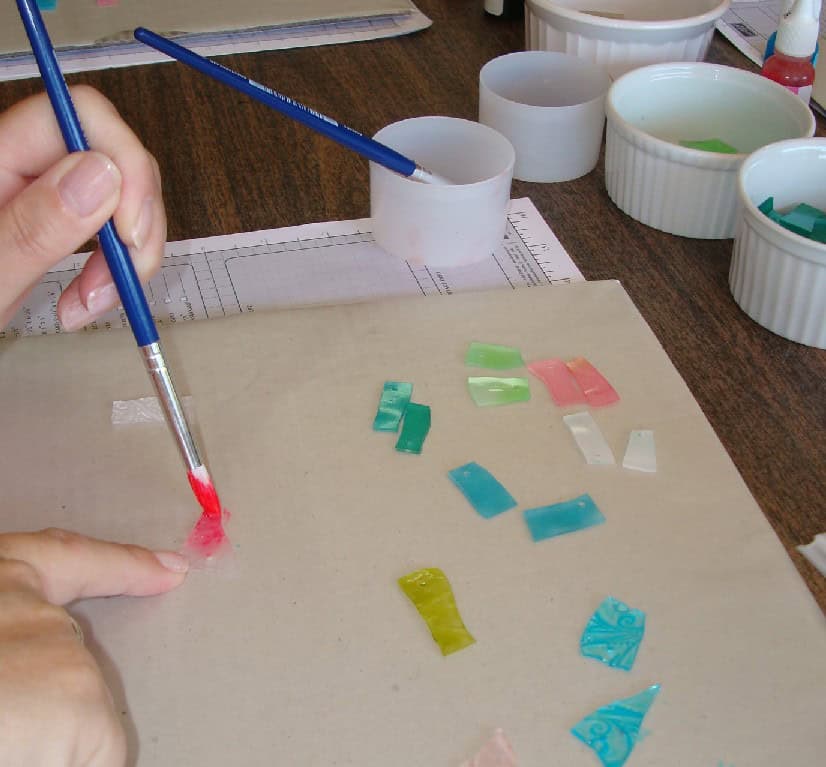
Then mix reinker and crystal effects and paint it on the pieces… voila… faux seaglass! It is amazing!
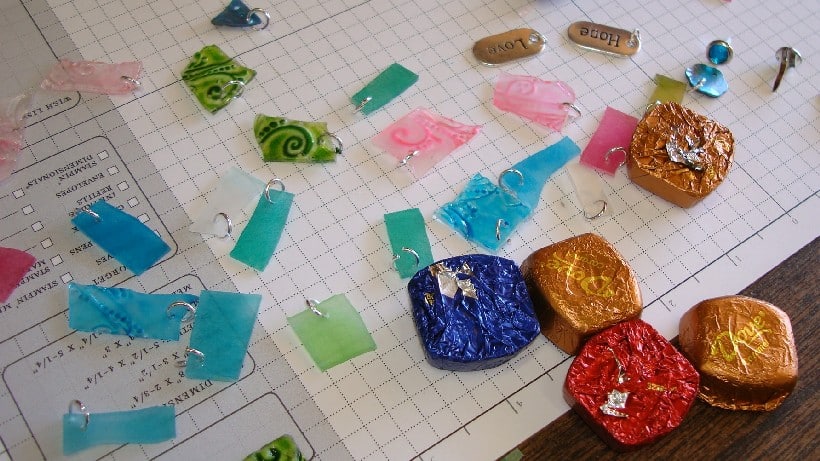
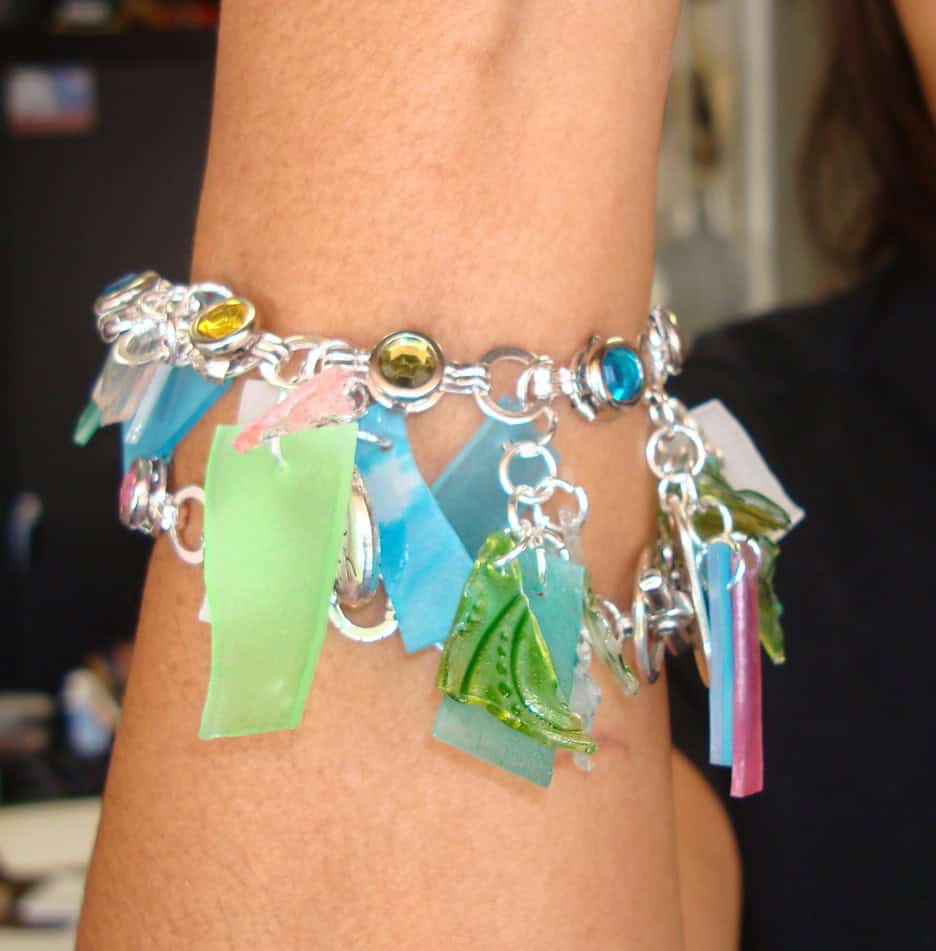
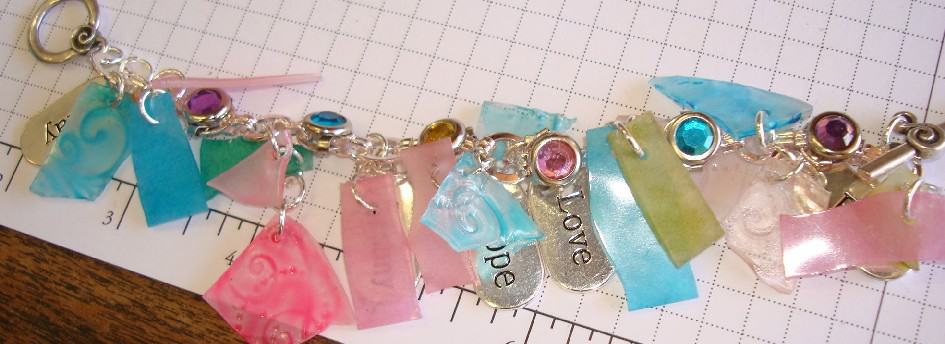
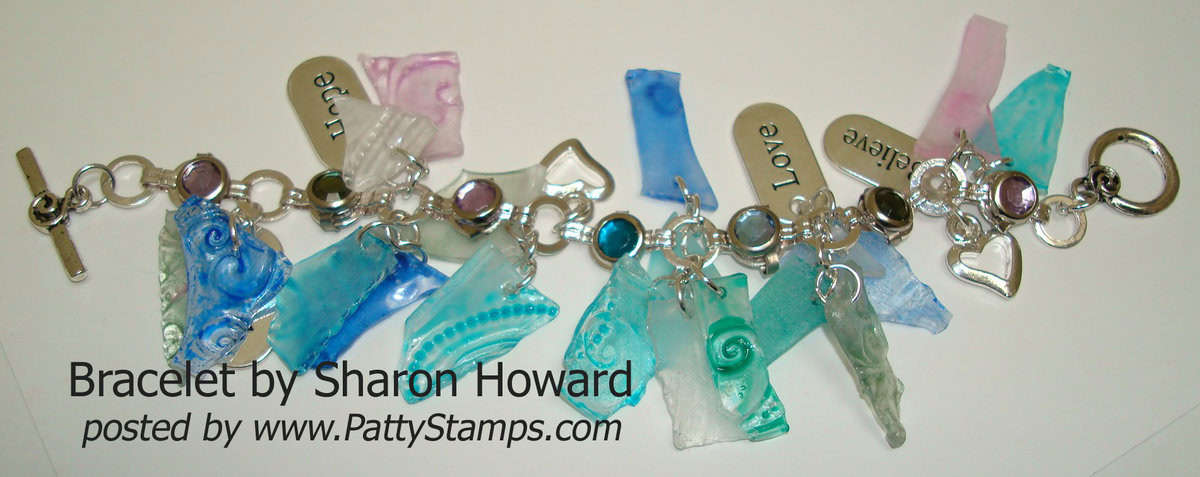
Then put jump rings through the holes and add them to bracelet chain. We also added rhinestone brads and charms to ours! LOVE THEM!!
Here are a few of them:
Now.. go buy shrink plastic and make one! 🙂

Oh Patty!! Fun Fun FUN!!!! And fabulous looking!!!
Thanks for sharing! Im digging in my pile looking for shrink plastic…!
This is just wonderful — I am going on vacation next week and was looking for a project to bring for my nieces — this is the one! Excellent project and pictures, as usual. Thanks!
Beautiful and looks like everyone had a great time.
How did you color she plain shrink plastic too look like seaglass – was this done before you shrunk it? It looks real!
Oh my goodness…I am runnin’ out today! How adorable!!!
these are fantastic, Patty!!
I definitly will have to make a special trip to get some shrink plastic.
Makes me wish we still have SHRINK PLASTIC!! I love Shrinkys! I love this look..it is great!
I have “clear” shrink plastic that turns white and fuzzy when I shrink it…what brand do you use?
And how do you clean the CE off the brushes or keep it so it doesn’t freeze up the brush while you’re working?
These are beautiful!
What a fun project. I just love it. Thanks for the idea and continuous inspiration.
Simply GORJUSSSS! Love it! Where ever did you find the little word charms?
Looks like you ladies had fun…I always say stampers are just “big kids” having fun, doing art projects. 🙂 I’ll see you next week!
These are absolutely beautiful! It looks like your girl’s had a great time making them. TFS:)
This is an incredible project!!!!!! Thanks for sharing. I’m looking for my shrink stuff as I type!!! HAHAHAHA
Cool project – they are beautiful! I was trying to figure out how the Dove chocolates played into making them…using the foil from them? NO? I got it! You ate them to make the project even MORE fun! LOL!
What a FUN class! I always loved the polyshrink…I still have a stash here. Will have to play!
These are great – where did you the neat bracelets – they look perfect for this project. – Maureen
What a great idea Patty! I love it. I’m definitely going to use this idea. Thanks so much for sharing.
Now this is just FABULOUS!! I’m going to bookmark this page for future use!!! Thanks for sharing!!
Too cool!! I love it! Thanks for sharing.
~Lacey Stephens
http://www.handstampedbylacey.typepad.com
Love the faux sea glass — you are talented!
that bracelet is beautiful!
WOW! This is great! I love the way your mind works — I never would have come up with this and it’s so pretty!
You were the Tutorial of the Week at Card of the Week.com. You can check out the original post at http://www.cardoftheweek.com/2008/07/tutorial-tues-3.html
I did use pictures off your blog, along with links back to your site and the posting. I hope that is alright. Let me know.
Thanks for sharing — this is a great project!
Absolutely amazing! Thanks so much for sharing how you did it, :0)
wow — neat idea — thanks for sharing!
I just love this project. I would love to know what colors you used. How much CE and ink do you use? Thanks, you are an inspiration. Candice
OHHH I love this idea!! I might have to try this ! TFS.. and Oh tell your friend Sharon to come in front of the camera and take a bow!! Does she have a blog?? I would love to tell her she is one rocking lady! 🙂
Hi Patty,
Earlier I glanced at the bracelets and wrote a note to return to read and study the directions.
At first, I thought the foil from the dove chocolate was some how used for the bracelet. Not that an excuseis needed to buy Dove chocolate.
While scrolling down, the picture of the group of women at the table reminded me of art time in kindergarten. I wonder if we all share happy memories of those long ago days?
Did you notice the red car in the second picture? The car looks like it has a big smile and where the sun is reflecting off the grill, it even looks like it has white teeth. Just add eyes on the windshield.
Can the shrinky dink sheets be colored before tearing it into strips?
Everyone’s bracelets turned out great.
Thank you.
you don’t have to buy shrink plastic! if you ever get number 6 plastic, like from salad bar containers, you can use that. i used to hate those containers, as you can’t really recycle them easily, but i stockpile it now.
here’s more information:
http://www.curbly.com/Chrisjob/posts/2252-DIY-Shrinky-Dinks-
Wow — that was fantastic — thanks for sharing!!
Omigosh…………these bracelets are just AMAZING!!! I just love them and they look really fun to make. I am wondering too, where do you get the bracelets to attach the *seaglass* to…….and also the cute charms?
What an awesome bracelet! Great class idea. I can’t believe you precolored and shrunk that many pieces!
I don’t know if you’ll see this – but when I made one of these years ago, we colored ours with chalk BEFORE we shrunk them. I think we might have sanded our SP first so that the chalk would adhere better. But this way, you color a big area then cut it down to size.
And congrats on your big award!
I am speechless and impressed at the same time when I first saw this bracelet because its really nice.
With these materials available you can do not only bracelets but also necklaces and other nice stuff.
these are great! very impressive. my wife makes bracelets so i understand the effort and creativity that goes into something like this
It’s been really great going through your blog post, very well informed and described. Great to read and know more about such kind of stuff.
Thanks for such an interesting article here. I was searching for something like that for quite a long time and at last I have found it here.