
Attention: Fans of the amazing Alcohol Ink Background Technique with Stampin’ Blends Markers… check this out… you can do this technique with Cardstock Vellum and Embossing Folders!!!!
WATCH THE VIDEO below for all the details!!!

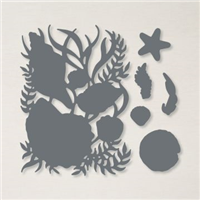
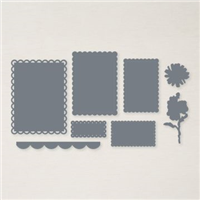
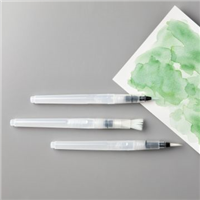
The 5 embossing folders featured in my video tutorial today are: Dandelions, Magnolia, Evergreen Forest, Seashells, Bloom. Each embossing folder was embossed with Cardstock Vellum, then colored with Stampin’ Blends markers and spritzed with rubbing alcohol. They are AMAZING in person!

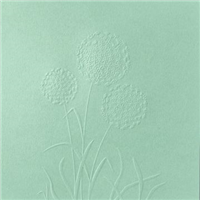
Above: Dandelion embossing folder #152953 and cardstock vellum with the Stampin’ Blends Alcohol Ink background technique!!
TIP
A good tip for all of these projects (except seashells): color and spray the focal image on the front, and color and spray the background on the back. This will keep the images from bleeding/spreading into each other!

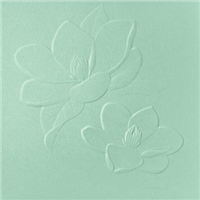
Above & Below: Magnolia 3D embossing folder #149579 and cardstock vellum, with Alcohol Ink technique.
The artsy effect of this technique is really wonderful.. kind of like a really loose watercolor painting! Not super detailed, but enough to let the viewer know what the subject is!


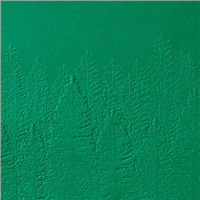
I think this might be my favorite.. not sure… the Evergreen Forest embossing folder #153576 with vellum cardstock and Stampin’ Blends Alcohol Ink technique.

All of these Stampin’ Up! card making supplies are available in my online store. Simply click any of the product photos at the bottom of this post! Thank you for your order!

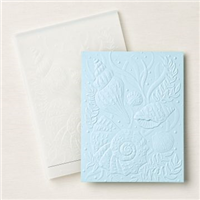
The Seashells embossing folder #154309 is the only one today that is not created on Vellum. I had lots of these Pearlescent paper seashell die cut pieces all ready to go and embossed, so I just tried out this technique on them and love the results!!!
VIDEO tutorial
Be sure to watch the video tutorial at the bottom of this post for all the instructions for todays cards!
I mounted the die cut seashells with Foam Adhesive and Dimensionals onto another Alcohol Ink background piece. For the instructions for the background, view this video.

I created these one afternoon while showing Tammy the alcohol ink technique. We each made cards with these embossing folders.. check out HER POST HERE!
Our 5th card idea today features the Bloom embossing folder and per the tip above in this post, the blue background is colored and spritzed on the back, but the flowers and leaves were done on the front. It keeps all the colors from bleeding together.

Watch the Video!
If reading this in an email feed, you may wish to watch the video on my PattyStamps blog, or my PattyStamps YouTube channel.
Want to leave a comment? Please CLICK HERE.

Watch my helpful online ordering video HERE with tips for shopping online.


Want to leave a comment? Please CLICK HERE.

Shop Online Anytime and Earn FREE STAMPS
SHOP and SAVE: Last Chance List
Join my Luv 2 Stamp Team of demonstrators – click for info
All my Favorites on Amazon - as an Amazon Associate I earn from qualifying purchases.
Sign Up for my Customer Newsletter
MY FREE VIDEOS tutorials


Patty, these are beautiful. I appreciate that you share your time & talent. Thank you.
Thank, Sylvia!!!
Wow! Thanks again for sharing your amazing creations and such clear instructions, can’t wait to try the evergreen embossing folder. We are in a heatwave here in Nanaimo BC so it may be the perfect project to cool down!!
So glad you enjoyed it!! Thanks for watching!!
Excellent video! Thanks for all your tips, especially coloring on both sides to eliminate color bleeding.
So glad you liked that tip!! 🙂
Love these cards! I was wondering if I did with clubs, would so much use of the blends be hard on them. Thoughts?
My opinion, Lynn, this is easier on the blends (coloring on vellum) than on paper that will really soak up the ink.
Hi Patty,
Beautiful card…love it.
Just wondering what you use as rubbing alcholol?
It’s the one I showed in the video. I prefer 90% to 99% and not anything lower than 90%. I got it at Target, you can also get it at most any drug store.
wow ! j’adore votre technique et votre façon claire et simple de l’expliquer. Les résultats sont tout simplement fantastique ! continuer à nous impressionner j’adore !
That was awesome.
Absolutely stunning! Thank you for sharing your tutorial.
So glad you enjoyed it!! Thank you!
I loved your demo of this super fun technique!!!!😍
Just beautiful
Thanks. Great presentation!