
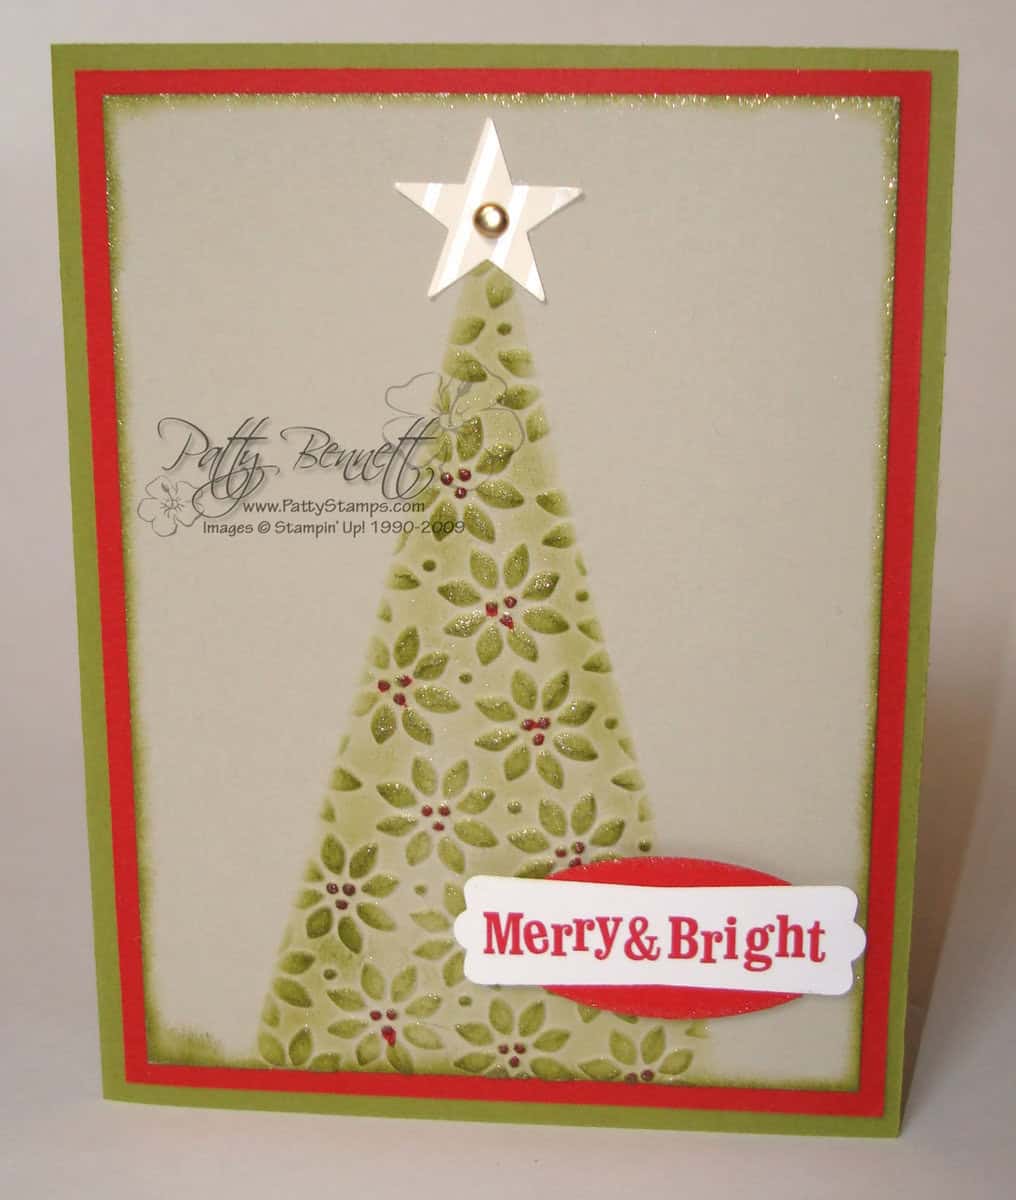
This is the 4th project we made at my BIG SHOT CLASS. I love this card and so did all of the participants :)
This card uses the Petals A Plenty Impressions Folder from Stampin' Up! It's only available for a limited time in the Holiday Mini Catalog… so if you don't have it yet, be sure to use my SHOP NOW link below to get it soon! :) (item code 116824 – pg 21)
To make this wonderful tree, follow these steps.
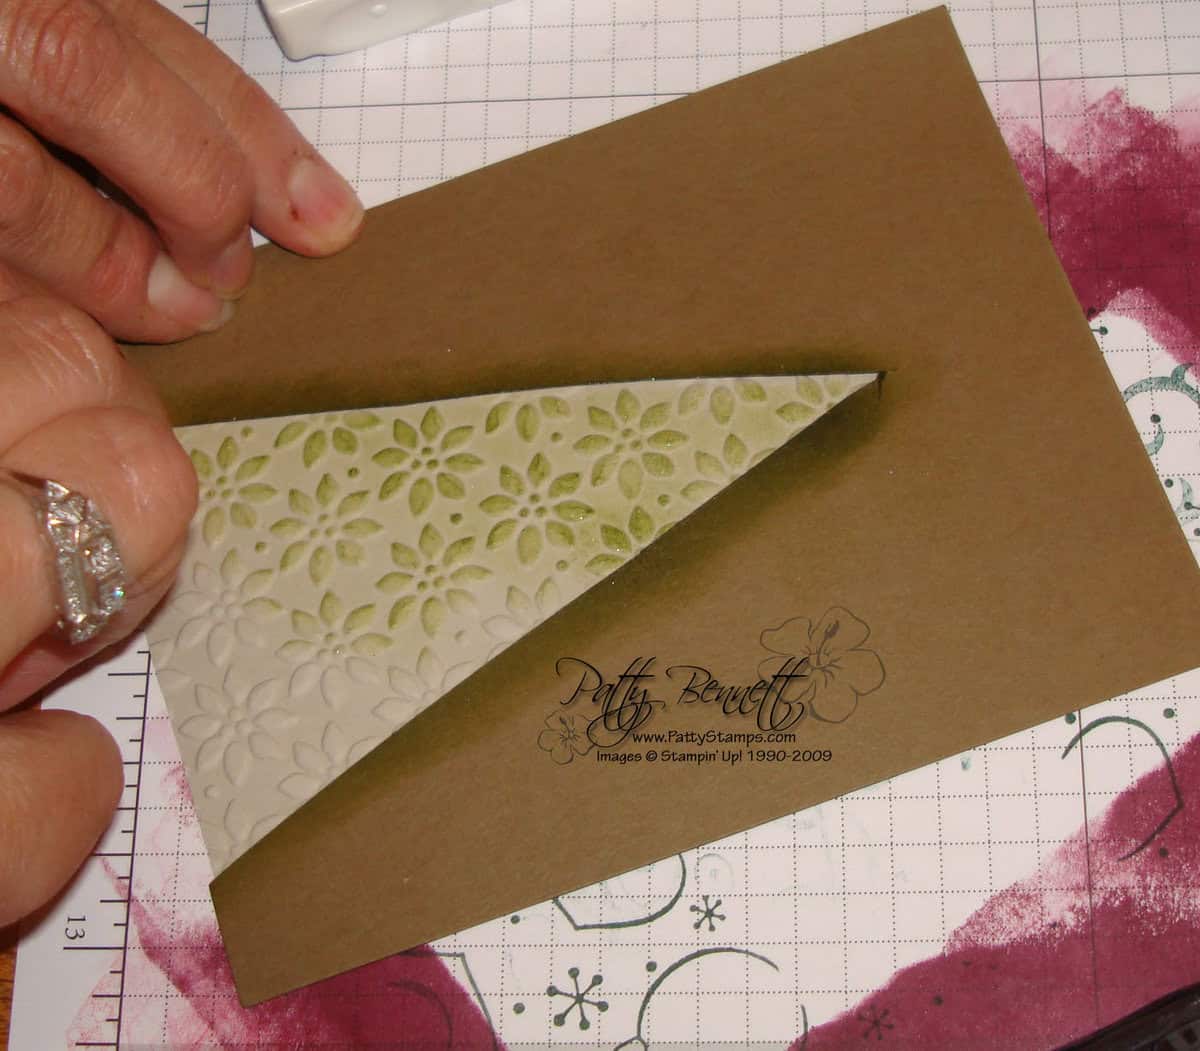
1. cut a triangle from Stampin' Up! chipboard (any size or shape triangle is ok) – I had to cut 2 pieces and layer them together
2. lay them ON TOP of your Petals a Plenty Embossing folder
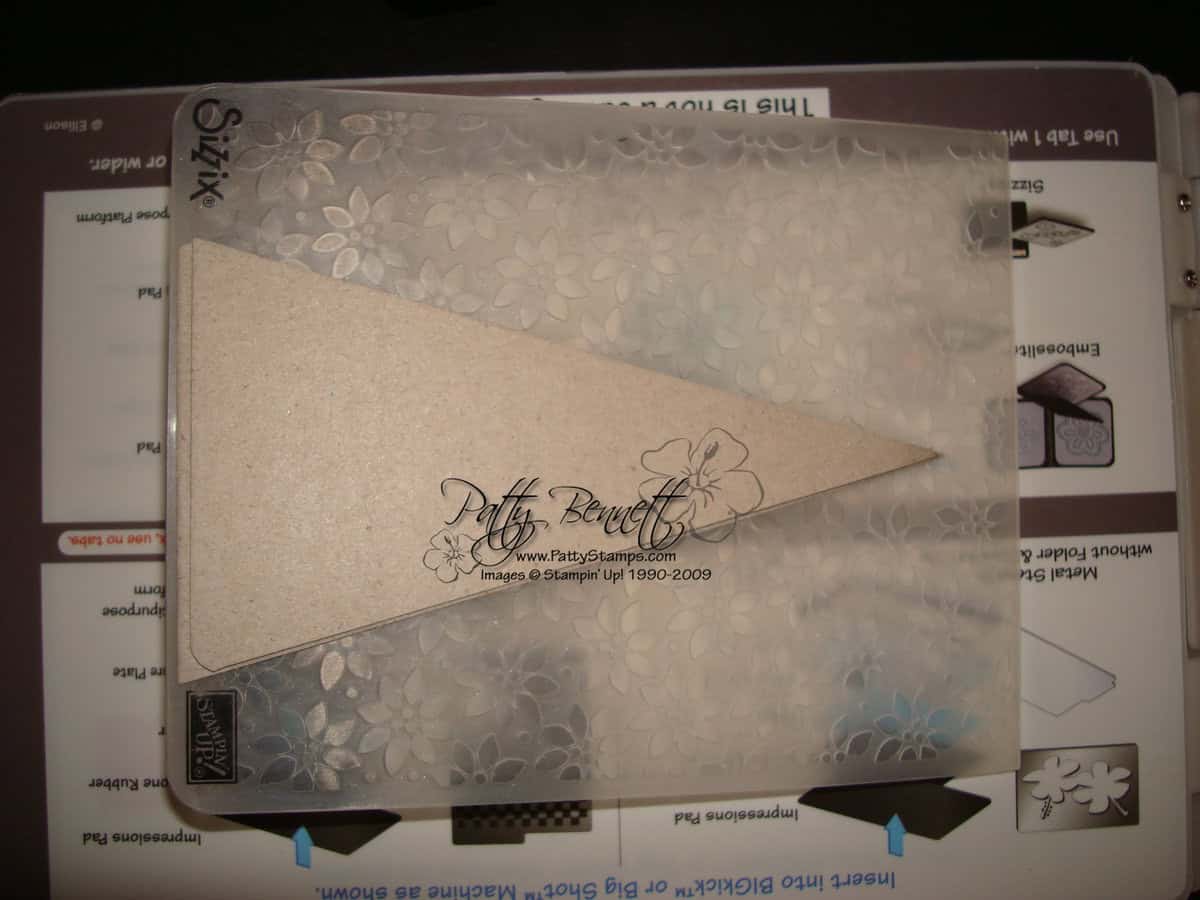
3. put your cardstock INSIDE the folder
4. put the folder (w/ cardstock inside) on TOP of tab 1 of the multipurpose platform and put a CLEAR PLATE ON TOP of the whole thing (have have detached tab 2, that is why you don't see it)
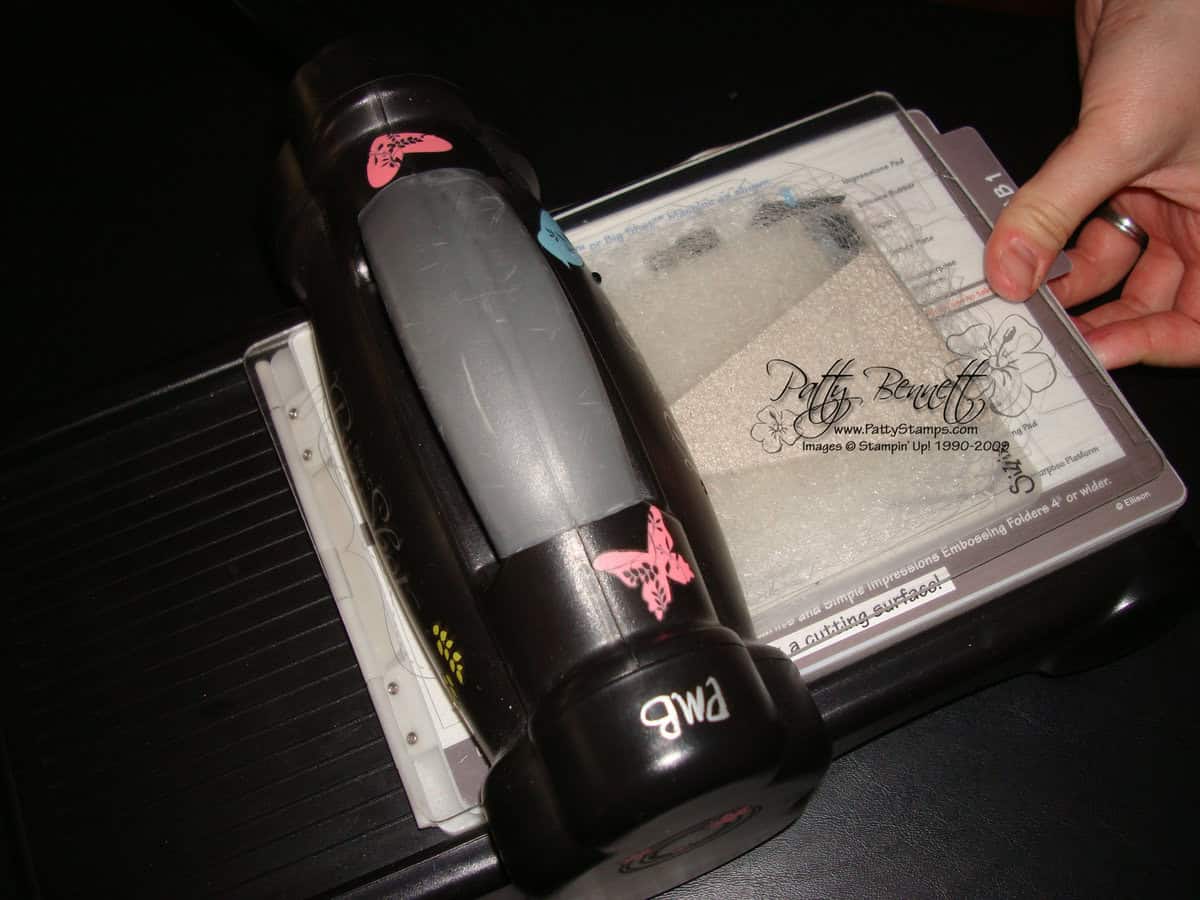
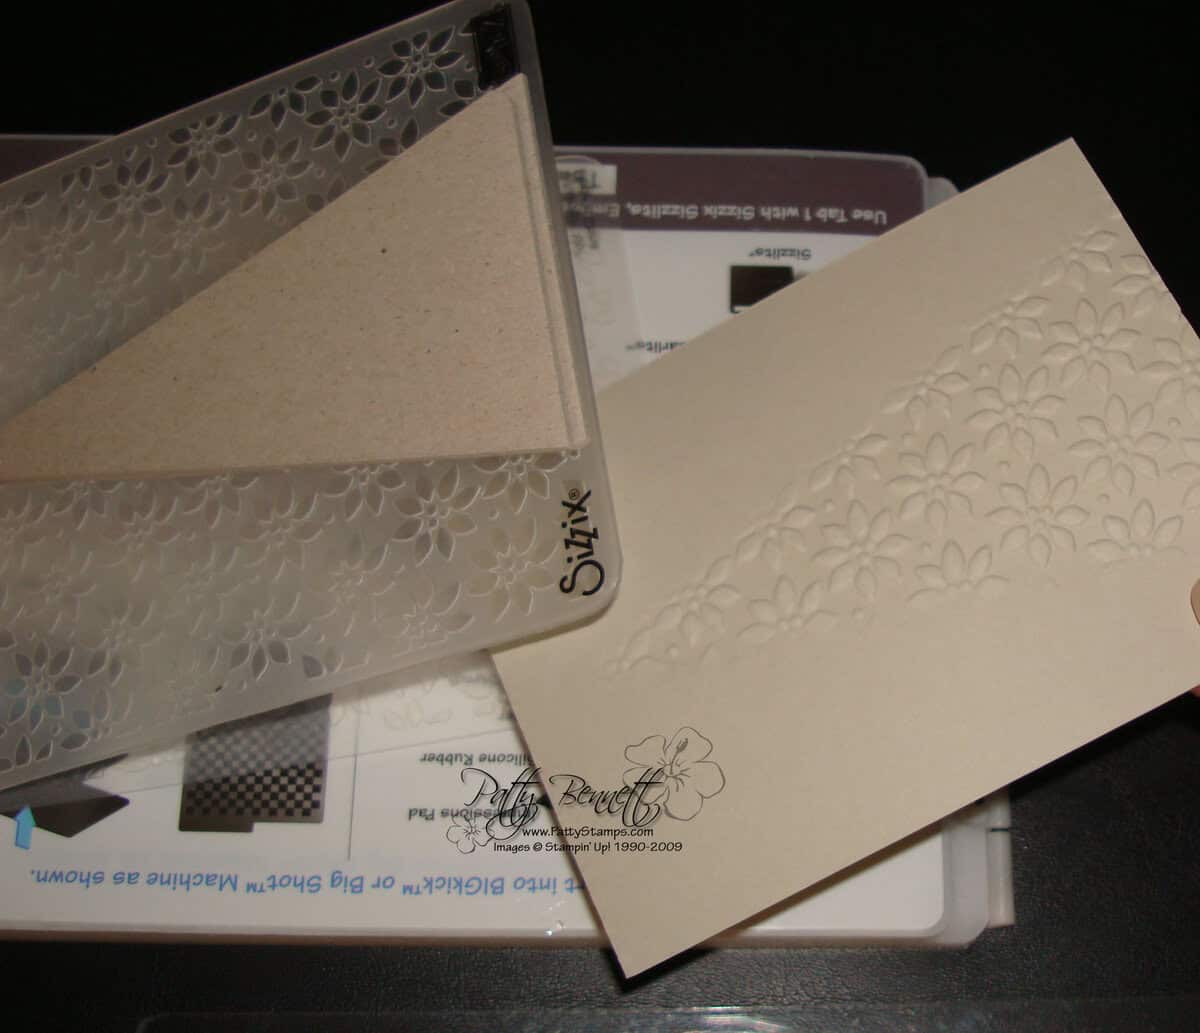
5. run it through the Stampin' Up! Big Shot and you will get this!
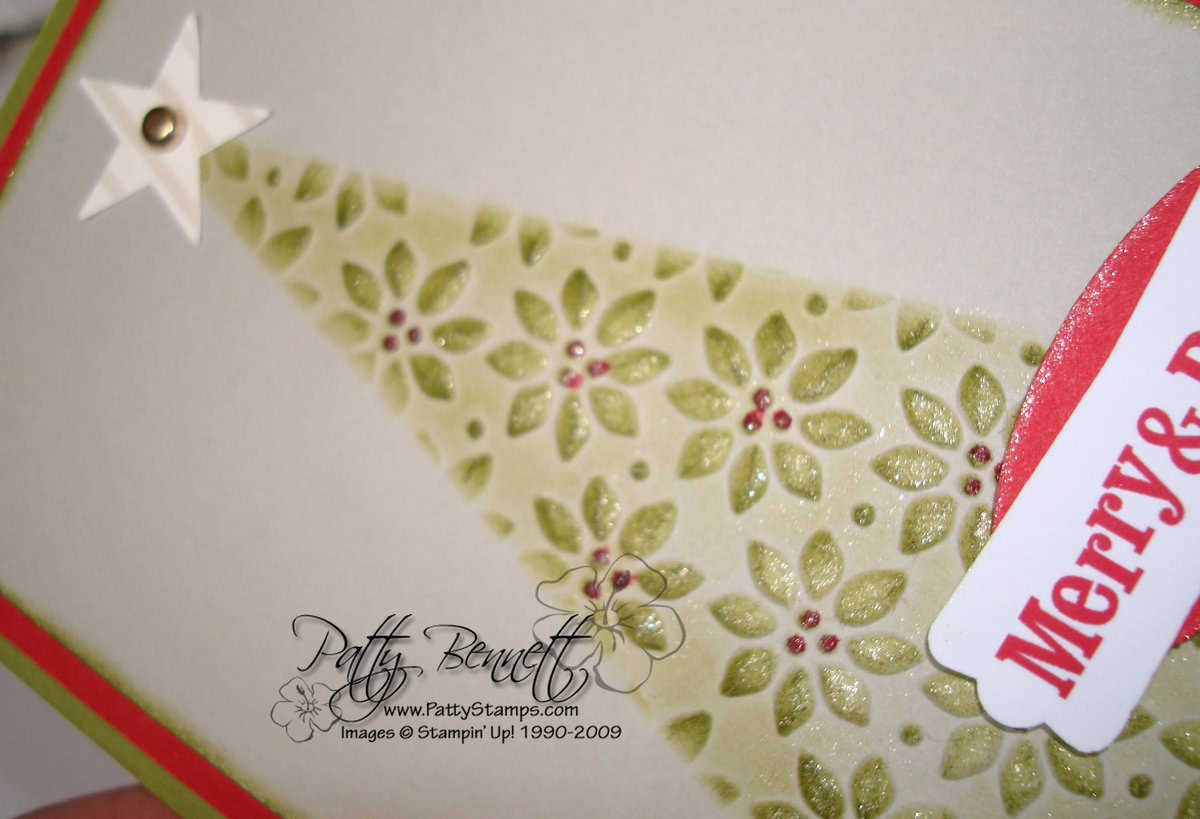
6. Cut a reverse mask to cover the flat portion of your card, and lay it over your cardstock. Using a sponge dauber color the tree with any color desired (Old Olive used here)

7. Do the same thing using Champagne Mist Shimmer paint and a different sponge dauber. (item codes 116806 and 102892)
8. Color in the berries with a Real Red marker (item code 100052)
9. Layer onto Real Red and Old Olive. I sponged the edges of my Sahara Sand cardstock with both the Old Olive and Shimmer Paint.
10. I punched a star from the "Bridesmaid" striped specialty paper and added a gold brad to the center. (item codes 109045 and 116479)
Add a greeting of your choice – we used printed greetings from My Digital Studio and punched them out with the Modern Label punch!


Wowza !!! Holy Smolly Macaroni !!! This is incredible !!!!!!!!!!!
LOVE IT LOVE IT LOVE IT !!!!!!!!
Patty you ROCK!! You continue to come up with these amazing tips & tricks and WOW us!! Looking forward to meeting you on the cruise 🙂
Patty – This is so very, very clever!! Thank you so much for the step by step. I can’t wait to share this with my customers. Thanks again!
Kay
Awesome!!!
Love it!
SO AWESOME I can’t wait to try it! Thanks!
Love it, love it love it!! So creative and cute-that would be you Patty!! 🙂
What a wonderful idea! Thanks so much for sharing with us!
Very cool indeed. I will definitely try this idea.
Patty, you rock! Thanks for sharing!!
Oh, Patty—your creative juices are endless; can’t wait to try this. THANKS!!
Wow this christmas card is so cute!
I love it!
hugs from Germany
Melanie
VERY cool! Thank you for the directions with pictures, since I am a visual learner!
WOW!!!!! Seriously, Patty, I know I’ve told you before but this is worth repeating: you are the Big Shot Queen! This card looks incredible! Thank you for sharing!
On a side note, I love the personalized blog header announcing the Tour! Can’t wait to see your projects on the 20th!
Cindy 🙂
Thank you so much Patty for the detailed instructions. This is going to be fun!
Beautiful, just beautiful!!! You are amazing. Thanks for the great tutorial. I never miss your blog posts~~you are super awesome!!! 😀
Wowza, that’s just plain cool! Thanks for sharing the how-to on it.
Congratulations! I just wanted you to know that your project will appear on the Yahoo Group Late Night Stamper’s blog finds of the day for Nov. 19. Want to receive your own copy of the blog finds of the day? Join us at http://groups.yahoo.com/group/stampinuplnstampers/
This is just stunning! You really need to send this one in to SU!
What a great tutorial! You Rock!!!!!!
M
Hi Patty! That is so cute!! Thanks for the great instructions. Hope you are having a good week.
Wanda
OH MY GOSH! see I am working on my little craft Christmas tree and NOW I have to stop cause I have to make a couple of these cards HOW Cute are they! YOU ROCK Patty! :)TFS!!
You are spectacular!!!!!!
your steps are so clear that i think i could be successful with this technique. thanks.
I love this – and am so pleased to have finally discovered how to emboss only certain sections of the card – will have to try this one soon!
This is a terrific technique, but I don’t have the Big Shot. I tried it with my Cuttlebug with no success. Any tips?? Thanks for sharing.
Am I the only one who can’t do this? LOL, I love to know where I am going wrong but can’t figure it out. Do you have a video tutorial on this?
Connie, this is GORGEOUS! What a great idea, and a simple card. Thank you so much for sharing!
Smiles are contagious,
Heather