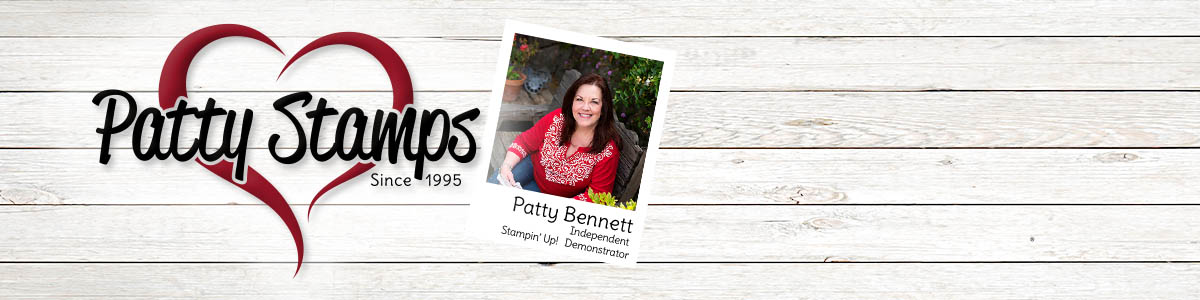
Begonia Belle floral card ideas
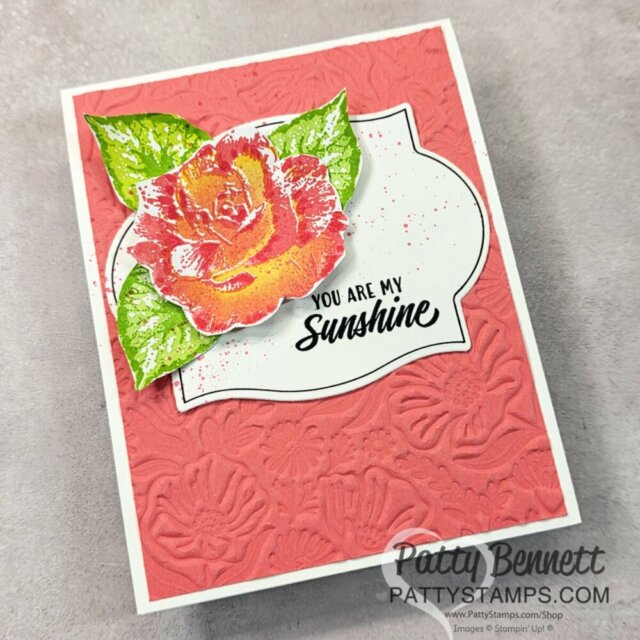
Begonias or roses… make them whatever you want! 🙂 The Stampin’ Up! July 2026 Product of the Month is a gorgeous stamp set called Begonia Belle. I used it on my weekly live video yesterday, but since I feel like they look more like roses, I am calling them roses. 🙂 (in my defense.. the begonia’s in my garden look NOTHING like this stamp… I shared that on the video).
I did have a GREAT time playing with this 2 step floral image, and have included my color combo suggestions, the video replay and supplies at the bottom of the post. Enjoy!
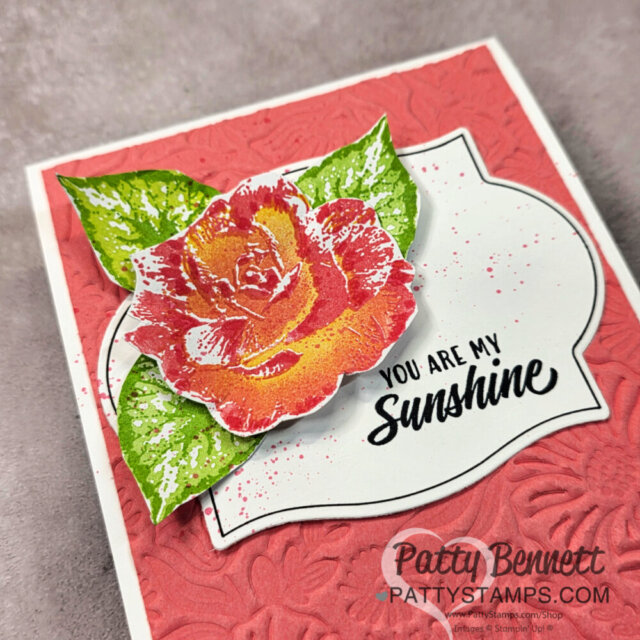
Be sure to check out the video to see how I added more than 2 colors to this 2 step stamp by using a sponge dauber.. I think it turned out amazing!
I used ink pads plus the sponge dauber.. be sure to watch the video for all the inking possibilities.
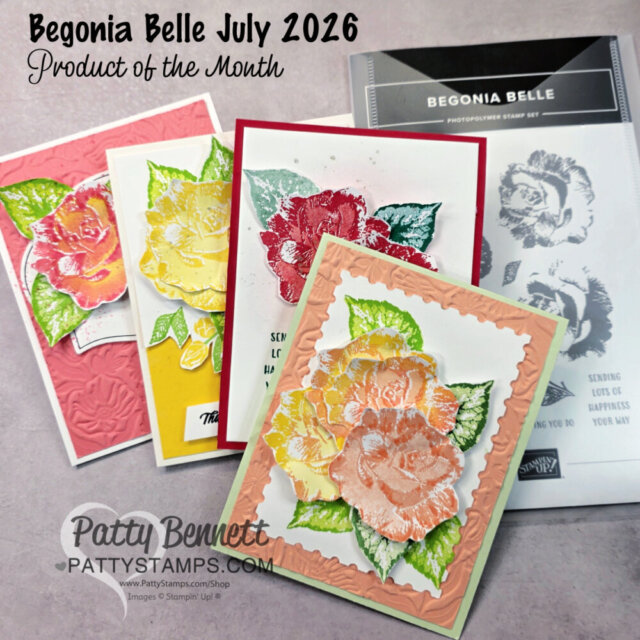
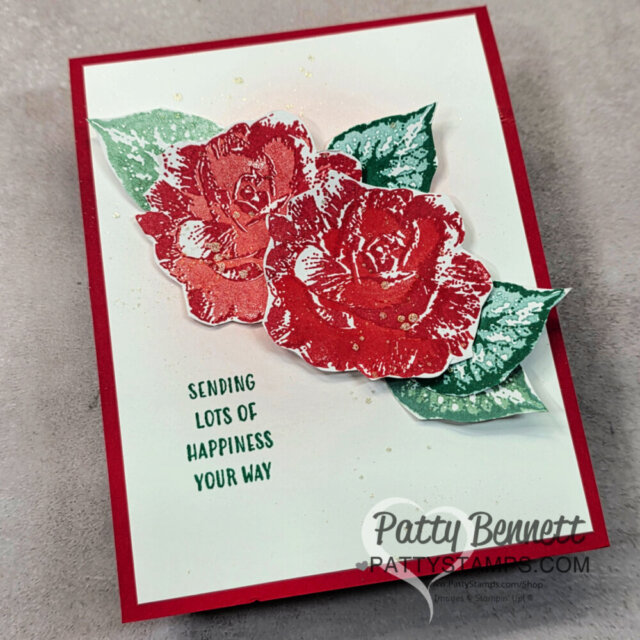
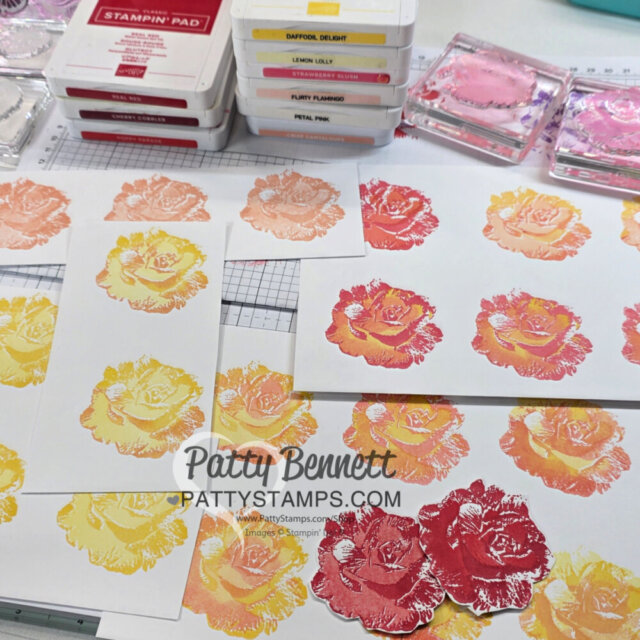
Below: I used Poppy Parade and Real Red for the roses, and Shaded Spruce for the leaves. I kept the card super simple with a white panel on a top fold Real Red card.
Two Step Color Combo suggestions:
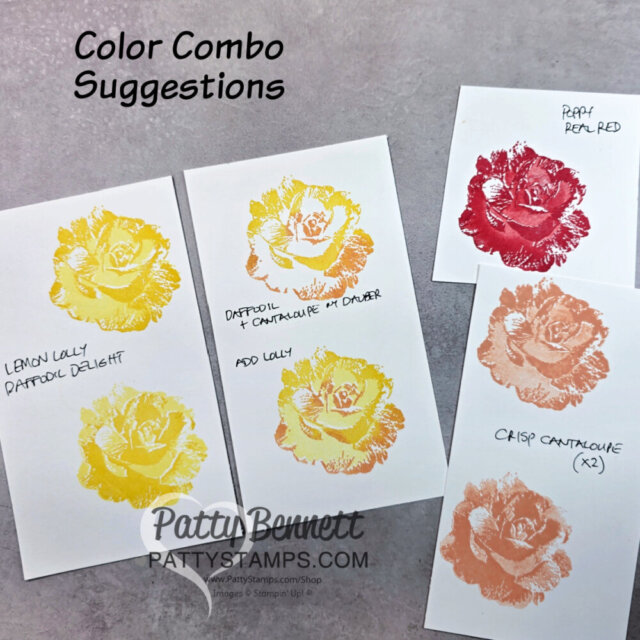
Above: one thing to note.. the flowers look different depending on which image you use for the darker or lighter ink. I don’t believe there is a right or wrong answer, and the fun is in playing with combinations and colors!
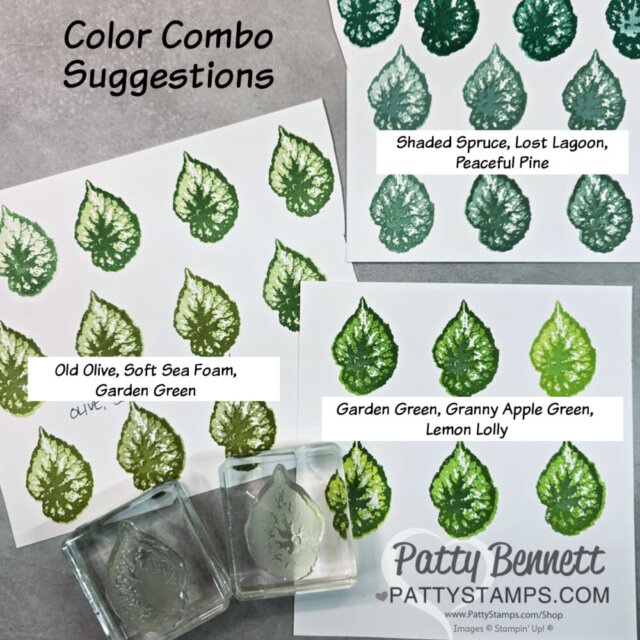
The reason I created so many different leaves is that to my eye, some flowers need a cool green leaf, some need a warm green leaf, and some need bold or soft colors.. so I stamped a bunch!
Click to learn more about color theory.
An amazing discovery!!
I read a tip on the Metallic Magic facebook group, about using the hot foil dies with the Impressions plate to “emboss”… guess what… it totally works!!!!!! Normally it’s used with our Impressions dies, but it sure works with the Garden Silhouette hot foil die!!!!!!
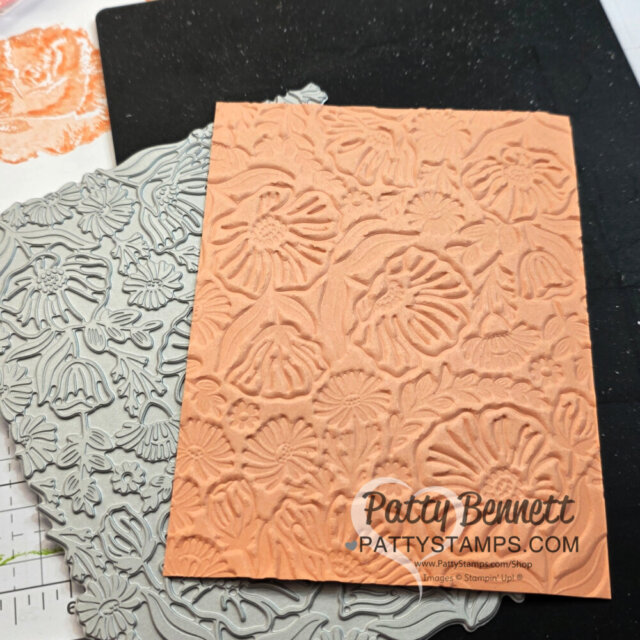
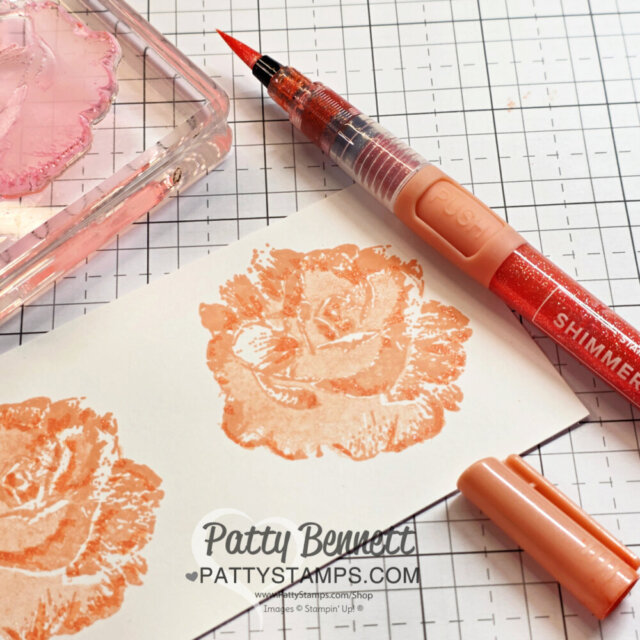
I used that Crisp Cantaloupe embossed background for my card below. I inked these begonias to look like my mom’s favorite Whisky Mac roses. I also added some Crisp Cantaloupe shimmer pen to the rose.. it shows up beautifully in person!

The shimmer pen adds lovely details, it shows up much better in person.
More roses stamped with all the Stampin’ UP! colors shown below in different combinations. It was SO fun to play!
Product of the Month
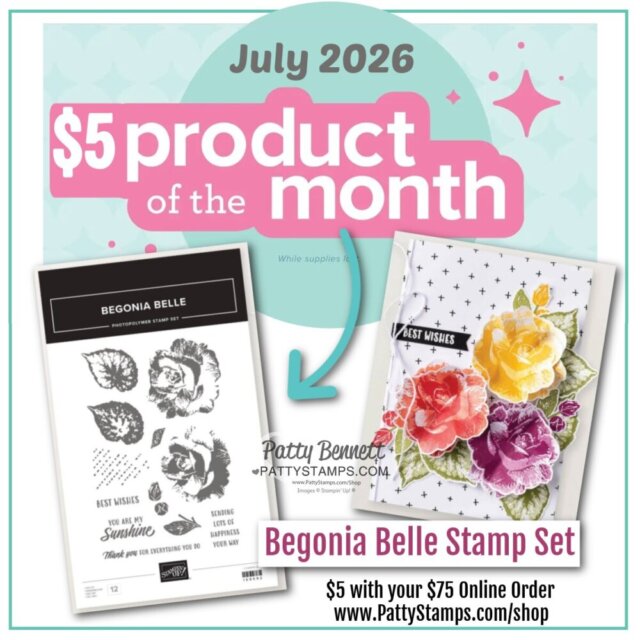
- The Begonia Belle stamp set Product of the Month is available to add to your $75 or more order, for just $5.
- Reminder: Product Order Totals of $75 qualify for Product of the Month offer (while supplies last – one of each gift per customer)
- Minimum product order amounts do NOT include tax or shipping.
- If you redeem coupons or Stampin’ Rewards discounts on your order, it reduces the amount of your Product Total. (example: if you order $80 but redeem $21 in Stampin’ Rewards, your order total is $59 and would not qualify for Product of the Month or Free Stamps with Patty)
Watch the Begonia Belle Video Replay
The Sweetly Sentimental cards shown in this video will be on my 7/26/26 blog post.
Shop for Card Making Supplies:


Want to leave a comment? Please CLICK HERE.

Shop Online Anytime and Earn FREE STAMPS
SHOP and SAVE: Last Chance List
Join my Luv 2 Stamp Team of demonstrators – click for info
All my Favorites on Amazon - as an Amazon Associate I earn from qualifying purchases.
Sign Up for my Customer Newsletter
MY FREE VIDEOS tutorials
Live with Patty! Rose & Begonia Cards
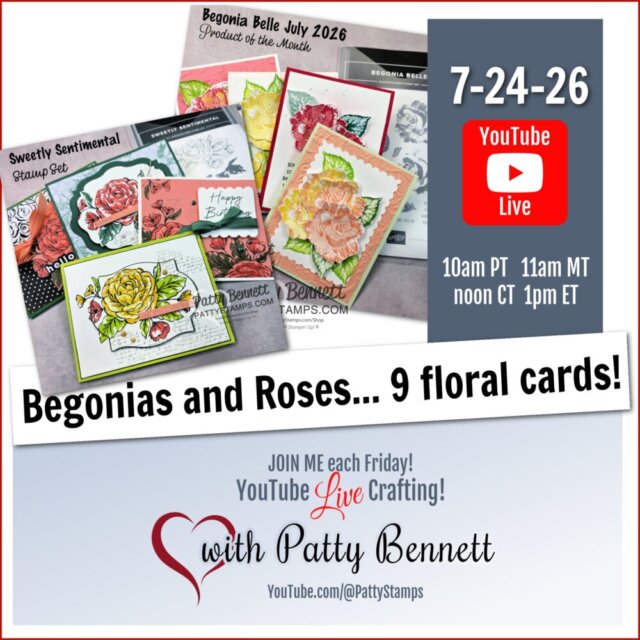
Begonias & Roses!!
I’m sure it’s no surprise that I’m sharing some beautiful floral cards with you today. The Stampin’ Up! Begonia Belle Product of the Month set, and the Sweetly Sentimental set really caught my eye. They are somewhat similar so I thought I’d share some tips and card ideas using both sets today!
Join me Live or watch the Replay
Use the link above to join me live at 10am PT today, or, the same link will work shortly after the live is done so you can catch the replay on my YouTube channel.
Replay & Card samples
I’ll include the replay plus the card samples from the video on my blog posts on July 25, 26 and 27.
Shop: Floral Card Supplies online
Just a reminder.. the Begonia Belle set is a Product of the Month special offer. It’s available as a $5 add on to your $75 order, while supplies last.
The embossing folder that keeps selling out

The Stampin’ Up! Sunflower 3D embossing folder… is probably the most popular Stampin’ Up! embossing folder ever! I’m pretty sure it’s sold out and restocked at least 10 times!
I paired the Sunflower embossing folder with the new Botanical Expressions die to make 2 very colorful, vibrant cards!

Crafting Tip!
I wasn’t sure about adding the square heartfelt thanks ephemera greeting to my card, so I die cut it with the Stylish Shapes circle die!! Voila… a much better fit for my card!

Layers for Card Above:
- Base Card: Balmy Blue 5-1/2″ x 8-1/2″ folded in half
- Blueberry Bushel mat layer: 5-3/8″ x 4-1/8″
- Balmy Blue Sunflower layer: 4″ x 5-1/4″, embossed with Sunflower embossing folder and streaked with Blueberry Bushel ink
- Calypso Coral layer: 4″ x 5-1/4″ embossed with Sunflower embossing folder, streaked with Coral ink, cut into 2 strips and layered on embossed Balmy Blue layer
- Granny Apple Green layer: about 3×4-1/4″ die cut with Botanical Expressions die
Sunflower embossing folder videos
For the sunflower card below, I colored the flowers and leaves with Stampin’ Blends markers, and streaked the black ink pad over the raised areas. In case you missed it.. here are some of my previous FREE sunflower embossing folder video tutorials:

Above: I used the Peaceful Pine shimmer brush to flick green sparkles on the Granny Apple Green Botanical Expressions die cut piece. It’s layered onto Daffodil Delight cardstock to help it pop. I used a Journaling Pen to draw “shadowing”, also to make it pop!
Sunflower Embossing Folder Card Supplies


Want to leave a comment? Please CLICK HERE.
Shop Online Anytime and Earn FREE STAMPS
SHOP and SAVE: Last Chance List
Join my Luv 2 Stamp Team of demonstrators – click for info
All my Favorites on Amazon - as an Amazon Associate I earn from qualifying purchases.
Sign Up for my Customer Newsletter
MY FREE VIDEOS tutorials