
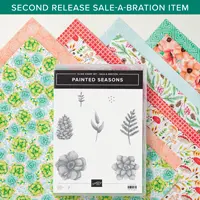
Sneak Peek! Sale-a-Bration Second Release Painted Season Bundle! Use the beautiful new Painted Season Designer Paper and Painted Season stamp set to repurpose a Stampin’ UP! framelit package!! This set and designer paper bundle is a free gift choice with your $100 Stampin’ UP! order starting on Friday, Feb. 15, 2019!

I hope you will enjoy the video below in this post – I will share all the details of how to repurpose the Stampin’ UP! framelit packaging and decorate it with the Painted Seasons bundle from Stampin’ UP!

I store my Stampin’ UP! framelits on magnet sheets (see this post), so I have lots of left over plastic framelit packages and I have been decorating them and repuposing them to fill with embellishments and give as gifts. The 3 framelit pouches I decorated with the Painted Seasons bundle in this post are for my Luv 2 Stamp group. They are prizes for an extra creative challenge for the month of February. (See This Post for my previous framlelit gift packaging idea for my team)

I stamped and die cut the Painted Seasons flowers and leaves, and spritzed them with Champagne Mist shimmer spray. (Mix rubbing alcohol and Champagne Mist shimmer paint in a Stampin’ Spritzer, shake well and spray). The Painted Seasons Framelits will be available for purchase starting March 1, 2019.

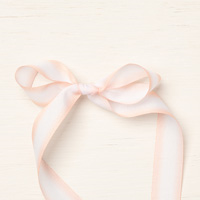
To decorate the framelit package flap, I used Tear & Tape, and added the Painted Season designer paper to the flap, then I die cut a Be Mine Stitched Heart with the Grapefruit Grove Sale-a-Bration foil and embossed that with the Country Floral Embossing Folder (also a free Sale-a-Bration gift choice coming on Feb. 15). I layered the flowers and leaves onto the flap with Stampin’ Dimensionals over the heart. I tied it all up with some Petal Pink Variegated Ribbon.

Below: the inside flap.

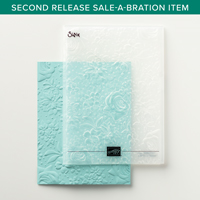
Below: Painted Seasons Bundle – your Sale-a-Bration gift choice with a $100 order starting on 2-15-19. See the entire new Second Release Brochure here!! (See all of the current Sale-a-Bration gifts here)

Enjoy this close up view of the Painted Season designer paper.. I LOVE IT!

Please enjoy my Facebook Live video tutorial replay below!! You’ll see all the tips for decorating the Framelit package, plus a few extra tips AND all the Sneak Peek items for Sale-a-Bration release 2 AND the new products available starting March 1.

Want to leave a comment? Please CLICK HERE.

Watch my helpful online ordering video HERE with tips for shopping online.


Want to leave a comment? Please CLICK HERE.

Shop Online Anytime and Earn FREE STAMPS
SHOP and SAVE: Last Chance List
Join my Luv 2 Stamp Team of demonstrators – click for info
All my Favorites on Amazon - as an Amazon Associate I earn from qualifying purchases.
Sign Up for my Customer Newsletter
MY FREE VIDEOS tutorials


I keep my framelits and thinlits on the magnet sheets, but I cut the magnetic sheets a bit shorter to fit and store them back in their original packaging. These I then file and it works out great. :<)
Perfect solution!! thanks for sharing!
What a great isea!!!! I love it!!!!!
so glad you enjoyed it Gay!!
I save those plastic envelopes from the dies all the time! What a great idea for repurposing.
Glad you saved them, too!! have fun decorating them!
Patty. You are soooo good. Do u sleep , lol… thanks youfor the tip
Happy Valentine’s Day
Hugs Frenchie
Yay! glad you enjoyed it!! yes, I either sleep or work 🙂 Not too much else 🙂
Fantastic idea and samples! Lovely!
These are so fun! Can I ask if you ever get rid of retried dies? If so, do you just sell on the magnetic sheets? Just curious. I am starting to put mine in clear pockets too because it’s easier to access and see the dies. I’m more apt to use them if I can see them easily. 🙂
Hi Jodi,
When I donate or sell me dies, I leave them on the magnet sheets in the clear plastic sleeves. It just takes too much time to take them off and repackage them ?
I use the envelopes,to put extra,die cuts and also for when I’ve cut a bunch of labels. Then when I need,,die,cut or label they are,ready to use on a,card. Ive,done this with extra pieces from cards I’ve made. Waste not want not.