Sneak Peek!
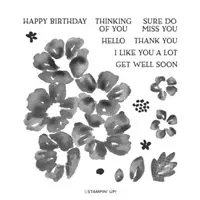
New stamp set, accessories and Misty Moonlight (new In Color) sneak peek featured in my cards today! Let me show you how to create these Blossoms in Bloom cards with the Stamparatus!
I love this fun fold, and I have cutting/scoring directions and a video for you today!!
Watch the Video!
I’ll be doing a Facebook Live today at 11am PT (Noon MT, 1pm CT and 2pm ET) to show you how I made these fun cards! Tune in HERE on my PattyStamps Facebook Business Page to watch! I’ll also post it to my YouTube channel today (updated… watch below!!
Cutting & Scoring Dimensions:
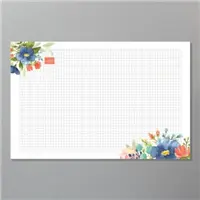
Below are the cutting dimensions for this fun fold card!
How to Stamp Blossoms in Bloom with Stamparatus:
I was making 60+ of these cards so I used the Stamparatus for 2 reasons: 1) create these cards quickly, and 2) if I didn’t stamp it perfectly I was able to ink the image again for great results every time!
Step 1: ink the large floral image from Blossoms in Bloom with Seaside Spray ink
Step 2: add some Night of Navy ink to the center of each flower with a Sponge Dauber
Step 3: press down on Whisper White cardstock, lift Stamparatus plate and check for good image, press down again or ink again if needed
Step 4: on side plate of Stamparatus, add small flowers and leaves, ink in Mango Melody and Granny Apple Green, press down and stamp over blue flower image
(not shown: I moved the small flowers and leaves and stamped them again for a total of 4 small flowers and 4 leaves total)
Step 5: mount flower center (dots) on clear block and ink with Night of Navy ink
Above & Below: I decided that I could get twice as many cards if I used a card design with a tall narrow image, so I cut my Whisper White stamped panels in 1/2 and made double the number of cards!!
Funny Story: After I created these a couple weeks ago, I showed them to my friend Kurstan, and she said, “Oh that’s the Jennifer McGuire technique”…. umm.. it is? Sure enough.. she had a similar idea on her blog recently! I was just trying to get twice as many cards for customer thank you cards and I wanted to use this fun fold idea.. it worked perfect!! 🙂
Tips for using the Stamparatus: If you have not used the Stampin’ UP! Stamparatus before, check out my additional tips on my Stamparatus playlist HERE!
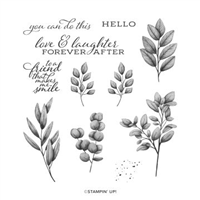
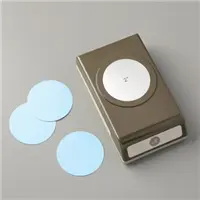
My supplies for this Blossoms in Bloom card included greetings from the new Forever Fern stamp set, stamped in Mango Melody on Stitched Shape circles. I used a Night of Navy circle (you can punch 2″ circles or use the Layering Circle dies to get desired size) to mat the White circle before adding them to my cards.
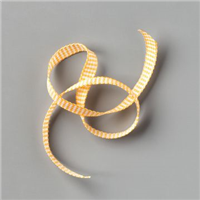
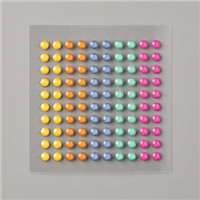
I first saw this fun fold card idea at a retreat I attended last February hosted by Amy Combes. I love this idea! I also added some Bumblebee Gingham ribbon to this card, and some new Misty Moonlight enamel dots.
New 2020-2021 Sneak Peek Products available 6-3-20:
- Blossoms in Bloom set #152684
- Forever Fern set #152559
- Misty Moonlight cardstock #153081
- Gingham Bumblebee ribbon #153658
- In Color Enamel dots #152480
Come Back Tomorrow!!!
Check out lots more color combo ideas for the Blossoms in Bloom set tomorrow!!
Want to leave a comment? Please CLICK HERE.
Watch my helpful online ordering video HERE with tips for shopping online.
Want to leave a comment? Please CLICK HERE.
Shop Online Anytime and Earn FREE STAMPS
SHOP and SAVE: Last Chance List
Join my Luv 2 Stamp Team of demonstrators – click for info
All my Favorites on Amazon - as an Amazon Associate I earn from qualifying purchases.
Sign Up for my Customer Newsletter
MY FREE VIDEOS tutorials











Beautiful cards and helpful tips. Inspiring blog. Thanks.
Thank you Mary!!
Beautiful card! Thanks for the video!
This card is gorgeous! The colors are exquisite, vibrant and exude such a
happy feeling! Can’t wait until June!
Thank you!!
what a great idea, Patty! Beautiful!
Thanks, Sandy!
Cool idea! Love your cards.
THanks Elaine!
Patty,
Your cards today are so beautiful, love the combo of colors! Thanks for demonstrating!!!
Gay
thanks Gay, it was fun to see you on the live!!
I was on the fence about purchasing this bundle. Your card In this post is unique and so fresh looking – I love the colors. Looks like I’ll be ordering the set real soon!
So glad you enjoyed it Pat!!
Love these cards!
Thanks, Wendy!
Great video! I love this set and the colors you used! I am a demonstrator in North Carolina and I have done a few videos with my iPhone. I would like to know how you set up your camera so you can also watch comments. Do you use a laptop with your camera? Is your camera an iPhone? Thanks for sharing.
Hi Sue, I use a stand called an ARKON stand. You can google them. it holds my Samsung phone that is doing the video, and my iPad which is facing me. I watch the comments on my iPad. Hope that helps?
Lovely. I didn’t even see the stamp set in the catalog but you’ve managed to make ti come alive. Now I want one.
That card is a winner! Beautiful.
Love this technique. Do you put a white insert on the inside flap to finish off the card to write a greeting?
Yes you can.. I think I mentioned it in the video. That would be the best place to write the greeting 🙂 So glad you enjoyed it!
Very sweet cards!
Loved your card ideas ? would you share the sizes of the circle dies you used? Thanks ?
I noted above it’s the 2″ circle punch and the Stitched Shape die.. it’s the next to the smallest stitched circle I believe, whichever one fits the 2″ circle punch. I’ve mailed all the cards so I can’t measure for sure.
Thanks!! I completely missed it ?
Please add me to your email list. Thank you
i love it u are so wonderful good job crafts.
So pretty! Love the light/dark on the flowers.
Loved your video on Blossoms in Bloom
This is my favorite card yet from the new catalog.
I love your cards; thanks for sharing them. You are very talented.
Edie Edie
Lexington (Welcome, NC)
Wow, thank you Edie! So very kind of you!
Patty, such a gorgeous card today!!! I watch the video and it looks so complicated at first but you show how easy this card is to create. Awesome!! Thank you for sharing!!! ?