So much fun!! Check out all of these cute birthday cards I made for my 2022 Birthday Club members!
Want One? and a coupon for a free stamp set next year? click for Birthday Club info!
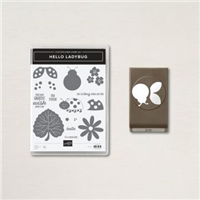
I used the new Hello Ladybug bundle and did a new product review on my Facebook Live yesterday!! Watch the replay at the bottom of this post if you were unable to join me live!
The Hello Ladybug bundle (stamp set and Ladybug Builder punch) will be available starting January 4, 2022. I mailed the new catalogs to all of my regular customers this week, and you’ll find it on page 20!
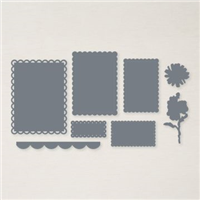
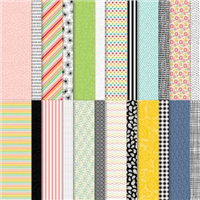
These sweet birthday club cards feature the Stampin’ UP! Pattern Party designer paper – a gift you can select with your host rewards for any order over $150. I also used the Happiest of Birthdays stamp set, stamped in Real Red ink on a Scalloped Contours die.
Pro Tip!
Be sure to use your Stampin’ Pierce Mat when stamping a solid image and a photopolymer stamp. As you can see above, it really produces a much better image!
Be sure to watch the video below to see how to make all 3 of these Fun Folds! They are all super simple!
Dimensions for cards above/below: Just cut 1-1/4″ off the front flap of your top fold card, and trim down your front piece of designer paper to 4×4.
Sale-a-Bration 2022!
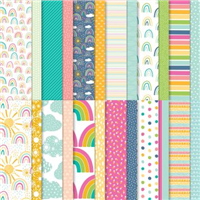
Also coming on January 4, 2022 is this cute pack of Sunshine & Rainbows designer paper.. a free gift choice!
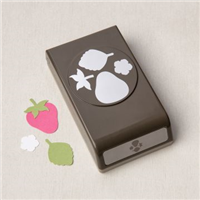
Above/Below: Use the flower from the Strawberry Builder Punch to punch out the small flowers from the Hello Ladybug set!
Dimensions for this card: cardstock is 5-1/2″ x 8-1/2″ scored at 1-1/4″ and 5-1/2″. DSP pieces for front: 1″x5-1/4″ and 2-3/4″ x 5-1/4″
Bonus Card with Sale-a-Bration paper
Here is the bonus ladybug card with the Sunshine & Rainbows Sale-a-Bration paper that I did with your help on the live video yesterday!!
Dimensions for this fun fold are shown below.. it’s the same fold as THIS card.
I know you won’t want to miss ordering the Hello Ladybug bundle on January 4!! If it’s like the cute punch bundles in the past, it will go on backorder QUICKLY! Be sure to add it to your SHOPPING LIST!
Watch the Video!
Enjoy the replay of my live video below! If you are reading this in an email, you may wish to watch the video HERE on my blog, or on my YouTube Channel.
Want to leave a comment? Please CLICK HERE.
Watch my helpful online ordering video HERE with tips for shopping online.
Price: $18.00
Want to leave a comment? Please CLICK HERE.
Shop Online Anytime and Earn FREE STAMPS
SHOP and SAVE: Last Chance List
Join my Luv 2 Stamp Team of demonstrators – click for info
All my Favorites on Amazon - as an Amazon Associate I earn from qualifying purchases.
Sign Up for my Customer Newsletter
MY FREE VIDEOS tutorials











WONDERFUL cards and ideas!!! Thank you for ALL of your tips!
Merry Christmas to you and your family!!
Thank you Melinda!!
After watching your video, I ordered the lady bugs!
So glad you enjoyed it!!
I love the variety of layouts. Can be used for all occasions.
yes, any occasion, any DSP.. so fun! Glad you enjoyed it!
The ladybugs are on my list. Your cards are adorable! Thanks for all the tips. Enjoy your day!
Thanks, Hilda!
I have this problem a lot with the photopolymer stamps. Can this Mat be used on the stamparatus? Normally, the Stamparatus is my go to stamping equipment.
I only use my mat once in awhile.
No this mat is too thick for the Stamparatus, but as mentioned in the video, there is a mat for the Stamparatus and you could try it for stamping.
Hello my name is Sheila and this is my first time to watch your video
Thanks for joining and watching!
Love the idea about how to punch the lady Bugs and their wings . I will be ordering this stamp set through my demonstrator.
I hope you will enjoy this bundle.. it’s so fun!!
What cute ladybugs. If you stamp the ladybug wings on red (or lighter red) paper, then you don’t get those annoying white edges all around your finished piece. Same thing with the black body. You could even just punch it out of black paper and not have the white all around it. I always stamp those yellow flowers on light yellow paper. Looks really great without the white border, but no need to do that if you are mounting them on all white background. (However, it saves your nice basic white cardstock if you do!)
Thanks for all the great tips!!
Thanks!! great idea! I love the white border, but also love your idea for those who prefer not to have it!
Just love your cards, so happy!
Thanks Anne!!
Love the Ladybug set but I have not received the new catalog for 2022. When will I receive mine? Thank you!!
Hi Patty:
I am having a difficult time with the scoring of the last card. I do not understand the score at 5 1/2 using 5 1/2 paper.
Also I would like the dimensions of the card stock at the bottom of the second card.
I love love love your cards and love to look at you on youtube.
When you score it as shown in the photo, you are scoring on the 8-1/2″ side and it should work fine.