


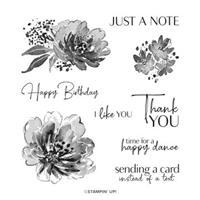
Thank you for joining me live yesterday to see how to add ink direct to your rubber stamps with Blending Brushes! I used the Flowing Flowers stamp set (one of my favorites from Stampin’ UP!) to create this colorful and simple handmade birthday card!

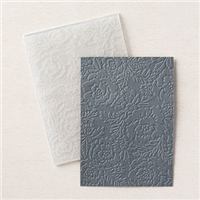
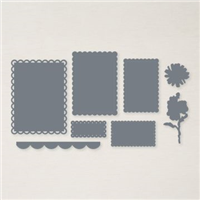
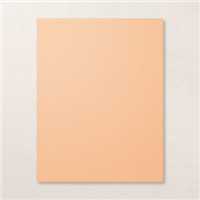
After stamping onto the Scalloped Contours die cut, I layered it on top of a Pale Papaya embossed piece of cardstock. My favorite is the Pretty Flowers embossing folder, but any of the embossing folders we played with on the video would work… gosh, nearly ANY embossing folder would be great!

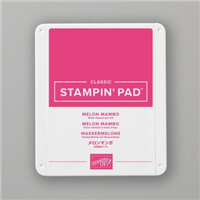
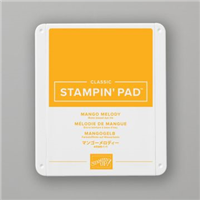
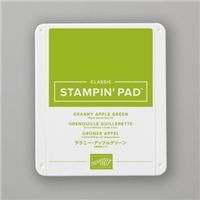
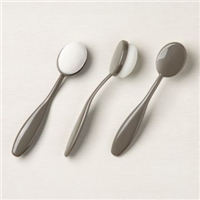
My color combo for adding ink direct to rubber is: Melon Mambo, Mango Melody & Granny Apple Green. I call these “Patty Colors”. You can select any color combo that you prefer. Dab your blending brush several times into your ink pad and pat and swirl it onto the rubber. Mixing the colors is fine, too. I dabbed the leaf portion of the stamp directly onto the ink pad, but you could also use Stampin’ Write Markers.

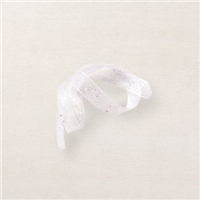
Tip! I wanted pretty sparkly ribbon on my card to go with the Iridescent Rhinestones, so I colored the White Glittered Organdy ribbon with the Granny Apple Green ink pad an my Blending Brush!

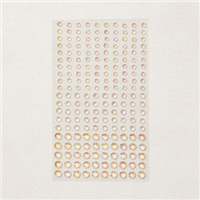
Add Iridescent Rhinestones to the flower centers to finish off this beauty!

When you watch the video, you’ll see that we tried the white embossing on the white background and it turned out so elegant!!

Then I decided to make one more after the live… here is a horizontal version with the Pale Papaya Pretty Flowers embossing folder background:

Watch the Video!
If you are reading this in an email feed, you may wish to watch the video on my blog post, or on my YouTube Channel.
Want to leave a comment? Please CLICK HERE.

Watch my helpful online ordering video HERE with tips for shopping online.


Want to leave a comment? Please CLICK HERE.

Shop Online Anytime and Earn FREE STAMPS
SHOP and SAVE: Last Chance List
Join my Luv 2 Stamp Team of demonstrators – click for info
All my Favorites on Amazon - as an Amazon Associate I earn from qualifying purchases.
Sign Up for my Customer Newsletter
MY FREE VIDEOS tutorials


Loved this. Very different way to color. Loved the Basic jewels, the colors and the organdy ribbon. I would not have thought to put those colors together, but they are beautiful.
Thank you, glad you enjoyed it!!
Beautiful card..thank you for the tips on using the brushes and coloring the ribbon.
Thank you Sue!!
That ribbon jumped right out at me! What a super idea and beautiful card!
Thank you Terry!!!
Loved your video. Tip with washi tap. And yes the alcohol marker for the ribbon
Thank you Robin!! so glad you enjoyed it!!
Loved all your tips on the blending brushes. Do you label your brushes as to what colors are on each brush?
Hi Liz, no, i don’t label them.. you can see my post about my system here: https://pattystamps.com/2021/02/blending-brush-storage-options-for-your-craft-room.html
Fantastic work. Those flowers really pop Patty. Love the stamp set you used with this technique. Off to watch your video…..
Thank you Beth!! Hope you enjoyed the video!
Enjoyed the video so much I am ordering this stamp set from my Canadian rep. I’ve followed you for years. Remember those Fifth Ave Floral stamps that you watercoloured? I made those for my daughter’s wedding thank yous.
Yes! Very similar to that!! So glad you enjoyed this. Those Fifth Ave Floral cards are probably in my top 10 fave projects of all times 🙂
I love this technique! Thank you for sharing.
Thanks for your kind comment Janeen!
What a beautiful card with the Flowing Flowers stamp set. I wonder if it’s still available now in Oct. 2023? Thank you Patti fir all your videos.
Carol B
You can always tell by clicking the product photo above.. it has retired. I’m sorry.
You are so clever. I luv all your ideas! Colors too!
I like to use the larger gems on projects like boxes, favors etc.
Loved your cards?
The washi tape is a good idea, thanks. The flowers are beautiful!