Lights of Aurora Card Making Video

A handmade greeting card features glittery black die-cut trees in the foreground, with snowy hills, distant black mountains, and a vibrant aurora borealis in purple, blue, and green tones in the sky. The card has a sparkling blue border and “PattyStamps.com” watermark. To read more, visit Patty Stamps (pattystamps.com)

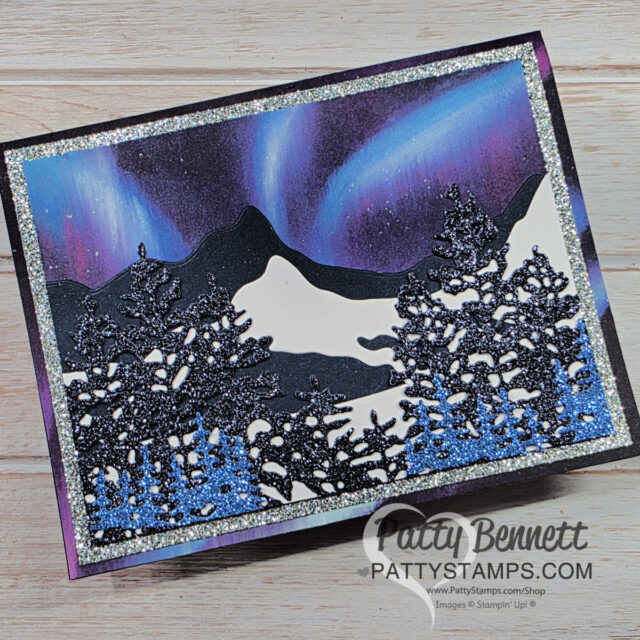
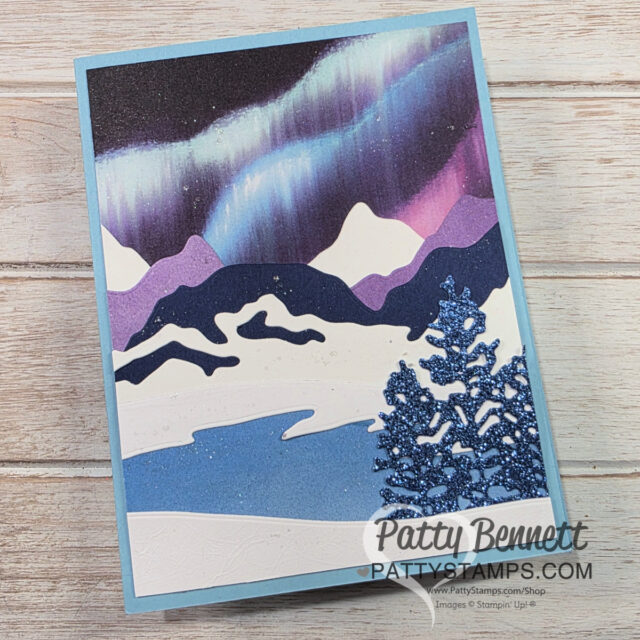
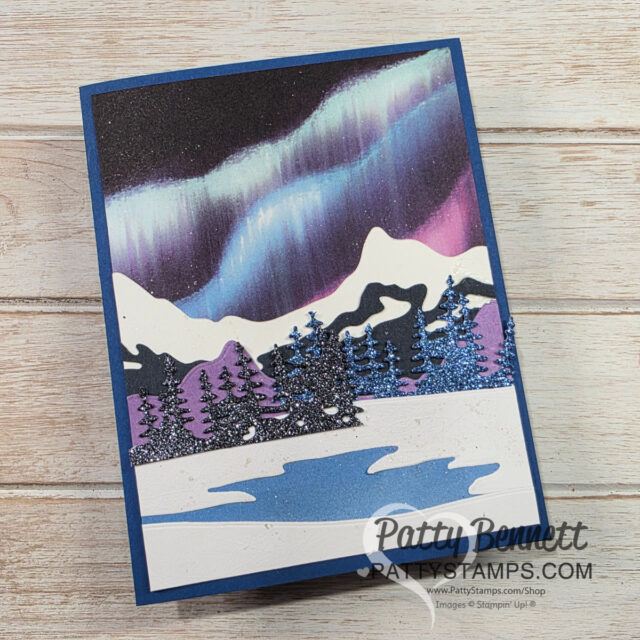
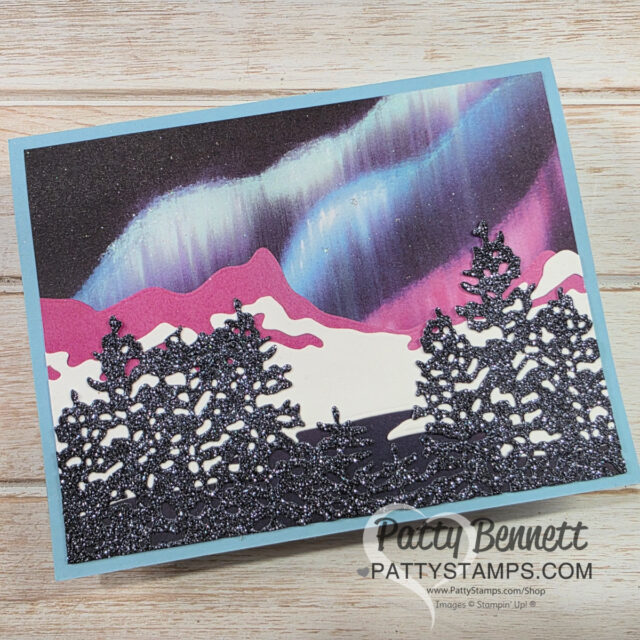
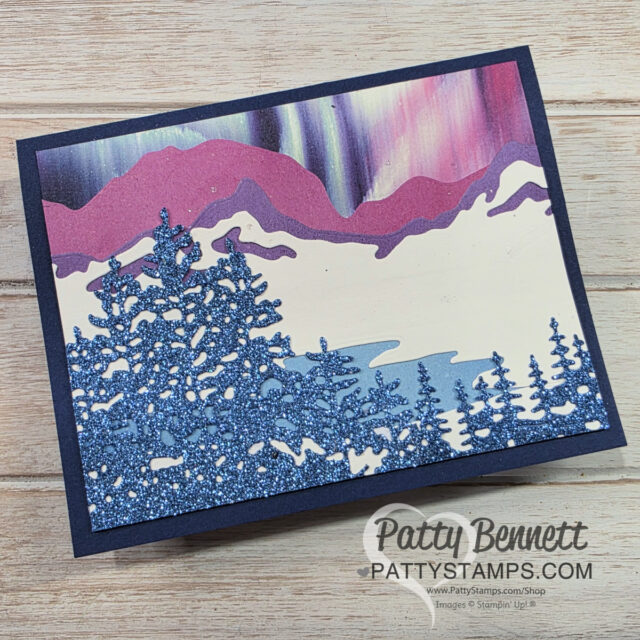
There so many design options with the Light & Wonder bundle and Lights of Aurora 6×6 paper stack (part of the Lights of Aurora Suite from Stampin’ UP!). You’ll notice that the cards on my blog post today show how you can create a portrait or landscape orientation for these cards.

My apologies… I did not realize that I used some of the paper upsidedown… I explained that in my video!! So sorry!!

A handmade greeting card featuring a snowy mountain landscape with sparkling blue trees in the foreground and a colorful aurora borealis in purple, blue, and white hues in the night sky; “Patty Bennett pattystamps.com” is printed at the bottom right. To read more, visit Patty Stamps (pattystamps.com)

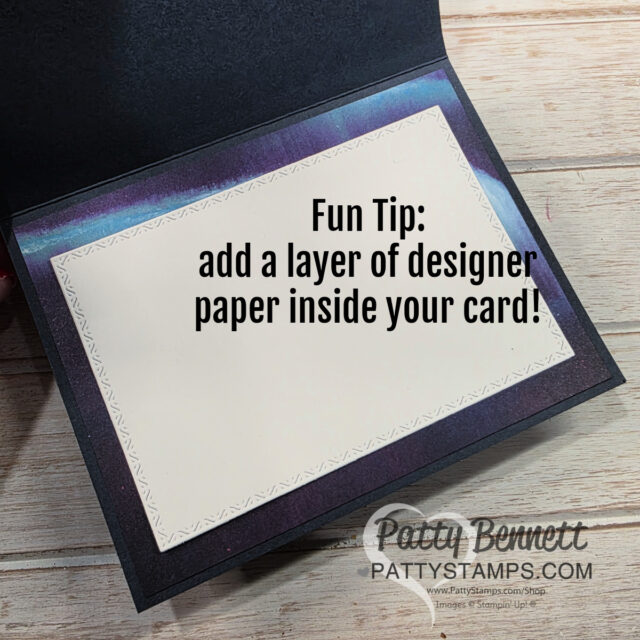
You may have noticed that I also used a lot of glimmer paper and Wink of Stella “splatter” for lots of pretty sparkle!! You can make them without if you prefer.

A card with a snowy landscape and northern lights. To read more, visit Patty Stamps (pattystamps.com)

In case you missed it… the glimmer paper is from the Peaceful Garden Glimmer Paper pack.

Die-cut paper shapes are arranged on a table, labeled as large & small trees, snowy mountain, lake, snowy hill, and mountains. The trees are blue, purple, and white while other shapes are cut from white, blue, and printed scenic paper. Text is overlaid at the top. To read more, visit Patty Stamps (pattystamps.com)

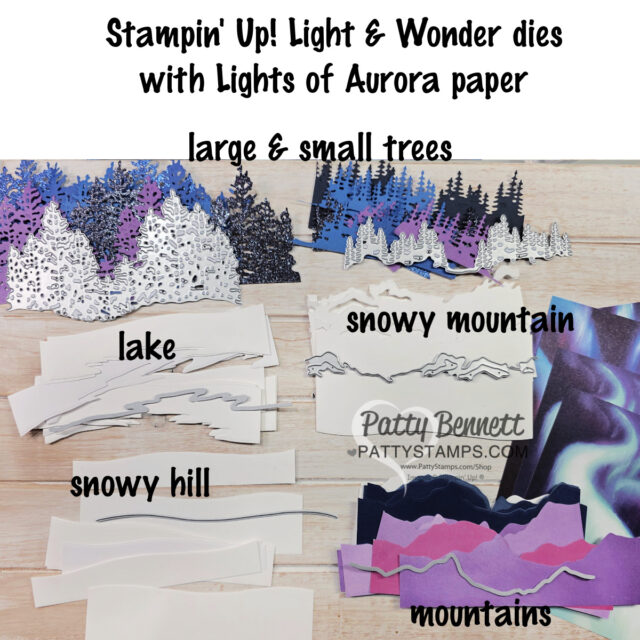
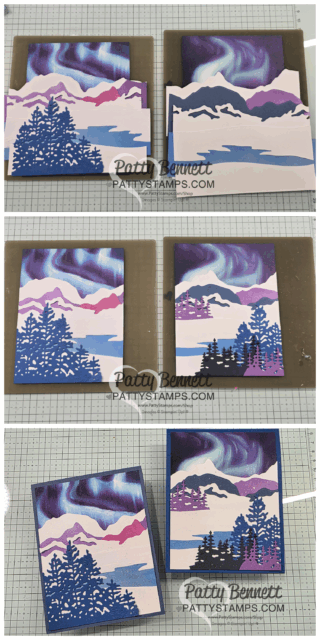
Scroll to the bottom of this post to see how I organized my Light & Wonder die cut pieces for these Lights of Aurora cards.

A handmade greeting card featuring a wintry night scene with silhouetted, glittery black pine trees in the foreground, snow-covered hills, and a vibrant aurora borealis in shades of blue, purple, and green across a dark sky. To read more, visit Patty Stamps (pattystamps.com)

As shown in the video… I used 5-1/2″ to 6″ wide cardstock and glimmer paper to die cut all the layers, overlapped them over the sides of the card back panel (use your Silicone sheet), then trimmed to card front size later.

A step-by-step collage shows how to create a handmade card featuring mountains, trees, and a colorful aurora sky with layered die-cut papers in shades of blue, pink, and purple. Each photo shows the card at different assembly stages on a grid surface. To read more, visit Patty Stamps (pattystamps.com)

Thank you for joining me on YouTube

We had fun playing with all the die cut layers in the Stampin’ UP! Light & Wonder bundle yesterday on my weekly live crafting video! If you missed this free cardmaking lesson, watch the video at the bottom of this post or on my YouTube channel.

A handmade greeting card features snowy hills, black glitter pine trees, and a vibrant aurora borealis sky in purple, blue, and white. The card has layered paper cutouts for the landscape and is displayed on a light wood surface. “Patty Bennett” watermark is visible. To read more, visit Patty Stamps (pattystamps.com)

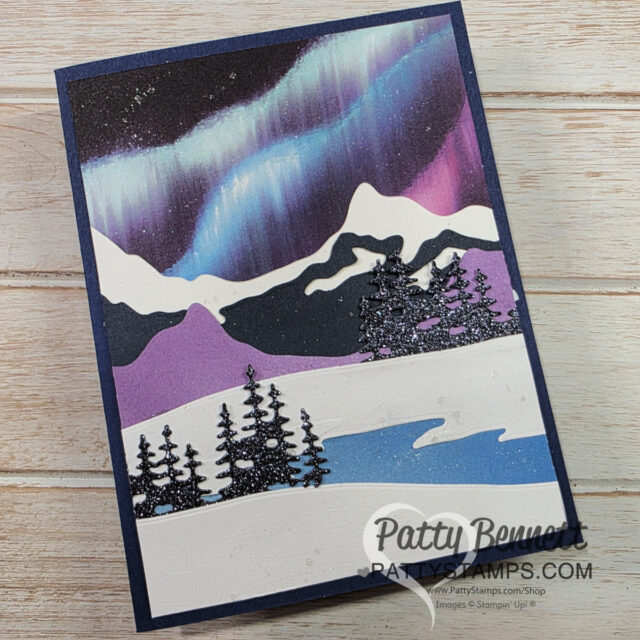
I really enjoyed using the Light & Wonder dies to create a lake.. it reminds me of Lake Tahoe here in our area.

A handmade card featuring glittery blue pine trees in the foreground, pink and purple mountains in the background, and a sky with aurora borealis-like streaks. The card is displayed on a wooden surface with a watermark reading "Patty Stamps. To read more, visit Patty Stamps (pattystamps.com)
An open handmade card shows a cream-colored inner panel bordered with a subtle pattern, set against a dark, blended background. The text on the panel reads: “Fun Tip: add a layer of designer paper inside your card!” The Patty Stamps watermark is at the bottom. To read more, visit Patty Stamps (pattystamps.com)

Lights of Aurora YouTube replay:

If you are reading this in an email, please visit my blog post for the replay, or here on YouTube.

How I organized my die cut pieces:

A clear plastic divided container holds organized paper pieces in various colors and designs. Labels read “DIVIDED CONTAINER” and “Patty’s Craft Room Essentials on Amazon.” The background shows a colorful, blurred craft room workspace. To read more, visit Patty Stamps (pattystamps.com)

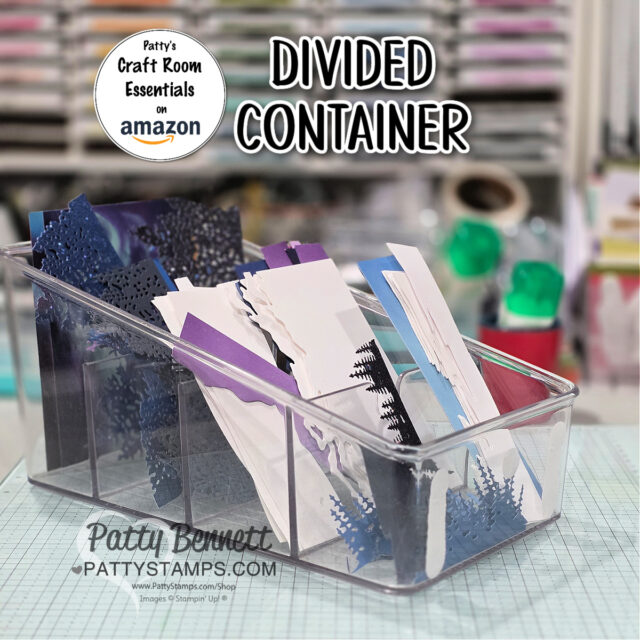
I love to pass along great finds for craft room organization, storage and crafting systems, so I thought you’d appreciate the link to this fabulous divided organizer in my Amazon Craft Room Essentials favorites store.

I used it to organize and store the Light & Wonder bundle pieces as I die cut them.

I also use this type of organizer to store my embellishments in the Avery envelopes, and also to organize card stock and die cut pieces when I am creating in bulk.

Want to leave a comment? Please CLICK HERE.

Shop online with Patty Bennett at www.MyStampOrder.com

Watch my helpful online ordering video HERE with tips for shopping online.

Shop online with Patty Bennett at www.MyStampOrder.com

Share This:

Explore Some More!


1 thought on “Lights of Aurora Card Making Video”

  1. Thanks so much for sharing the video and the very helpful tips. The cards are beautiful. Upside down Northern Lights are a wonder of nature and are something to be enjoyed.

    Reply

Leave a Comment