
Watch the replay: learn Cardstock Cutting Tips
Yesterday, during my weekly YouTube live video, I shared my top 5 cardstock cutting tips to maximize your paper, and your investment. Learn ways to cut cardstock and 12×12 designer paper to create layers, reduce waste and save money when making handmade cards.
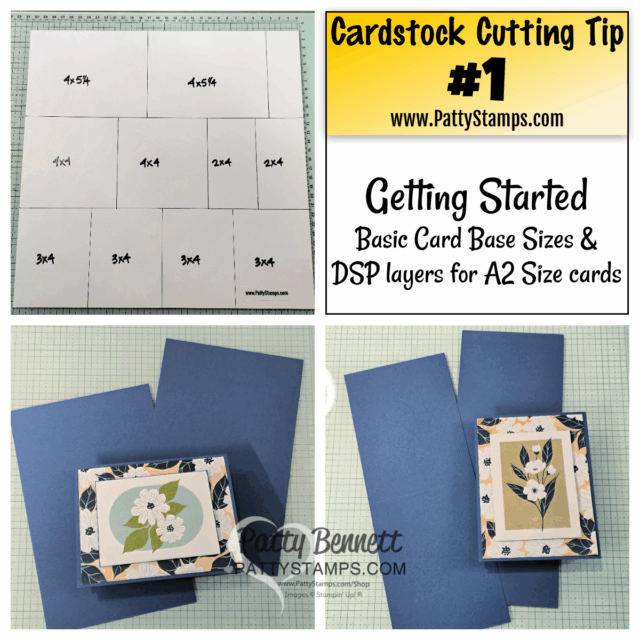
As mentioned in the video, cutting your 8-1/2″x11″ cardstock and your 12×12 designer paper using the measurements I provided will reduce waste and help you use your card making products more efficiently.
Make 2 landscape card bases by scoring your 8-1/2″x11″ cardstock at 4-1/4″, flip it and cut at 5-1/2″
Make 2 portrait orientation card bases by scoring your 8-1/2″x11″ cardstock at 5-1/2″, flip it and cut at 4-1/4″
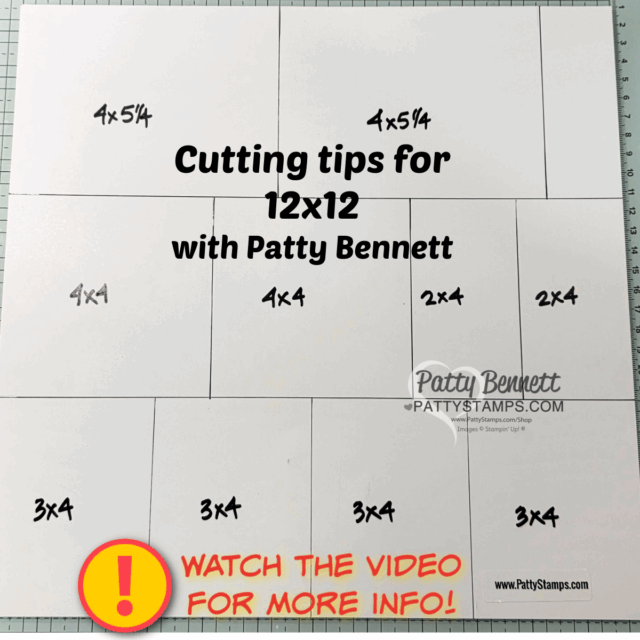
Create simple designer series paper (DSP) layers by cutting your 12″x12″ into 4″ strips, then cut 5-1/4″ pieces to layer on the card bases mentioned above. Use the other measurements to create 2×4, 3×4 and 4×4 layers for your cards. (see tips 2, 3, 4 and 5)
WATCH THE VIDEO replay at the bottom of this post for more info.
Starting with the basics in tip #1, let’s build on those measurements and let me show you 4 more basic card designs that use those sizes of cardstock and 12×12 designer paper (or Memories & More cards).
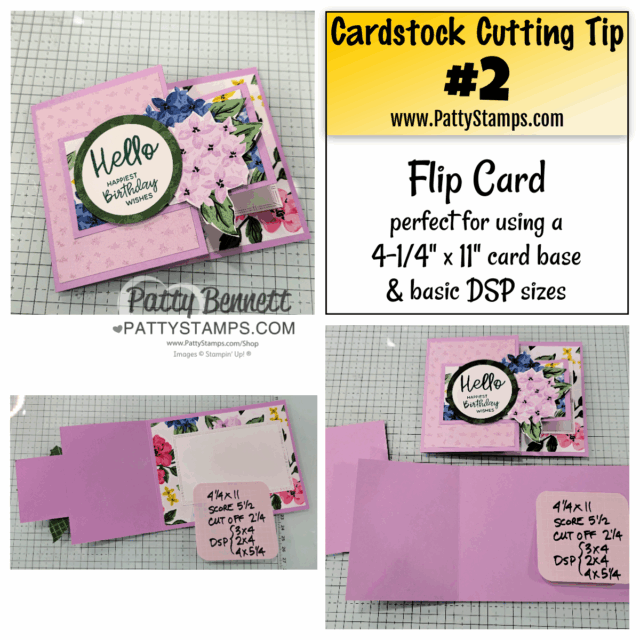
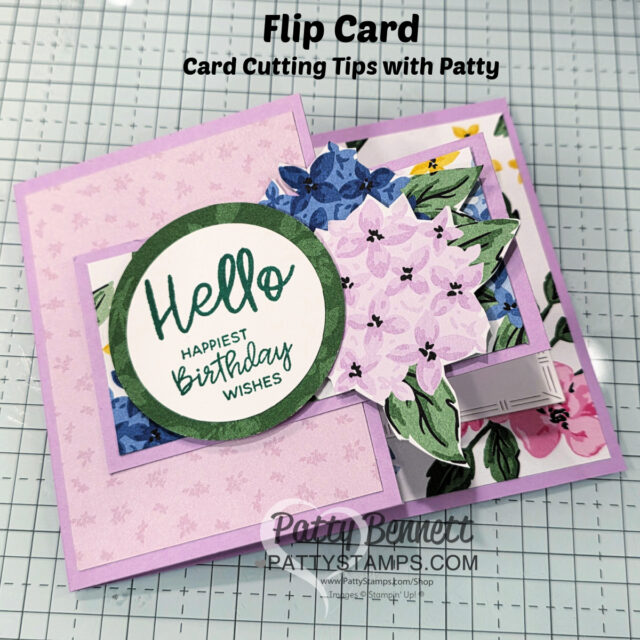
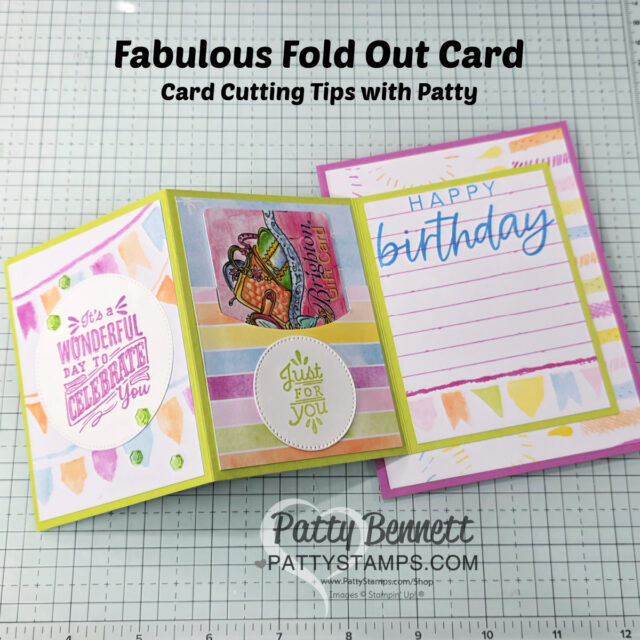
A very basic fun fold that uses 1/2 a sheet of cardstock and 3 pieces of designer paper is the Flip card I shared in Cardstock Cutting tip #2.
Uses 2×4, 3×4 and 4×5-1/4″ pieces from the 12×12 designer paper piece.
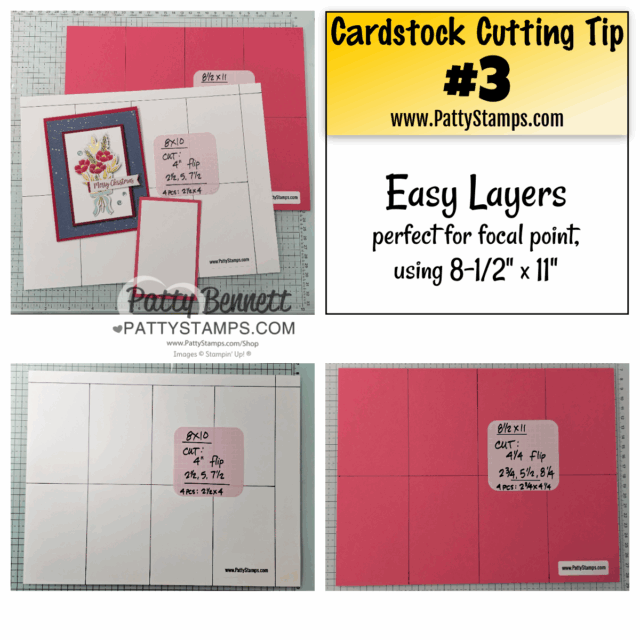
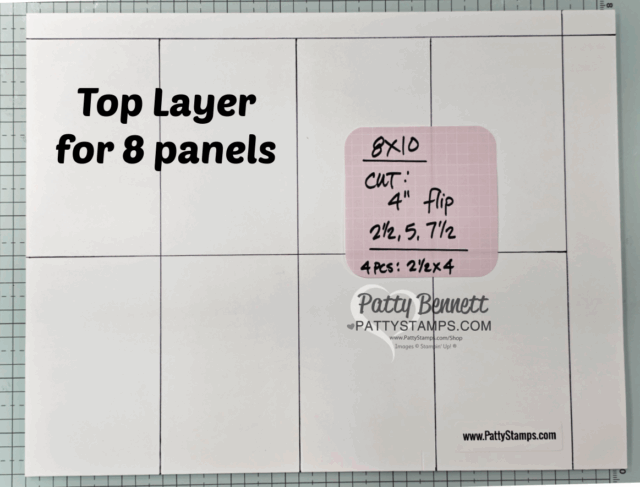
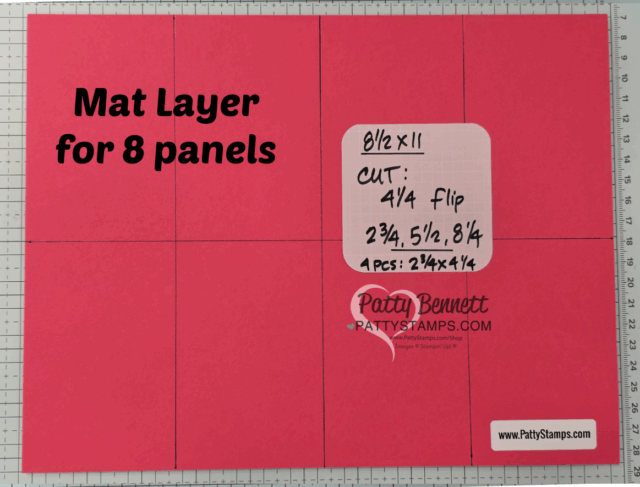
To create simple focal point layers for your card, use the measurements below to create perfectly matted layers with a white rectangle and colored cardstock mat layer.
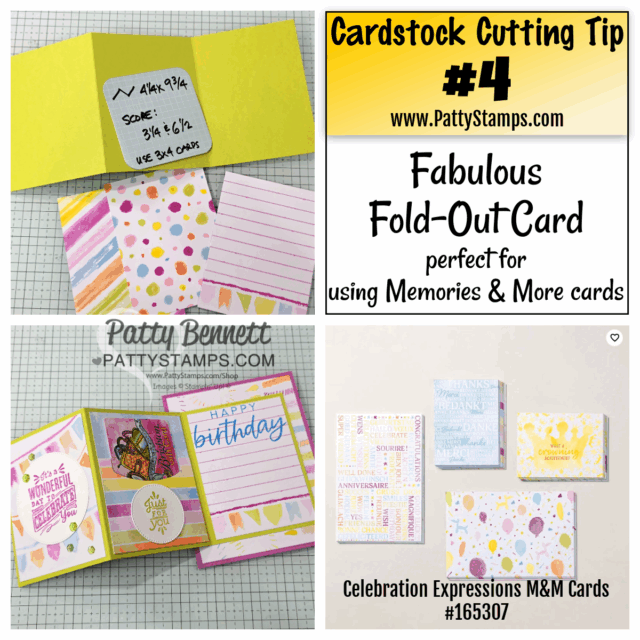
A Pull Out card is the perfect way to use your 3×4 designer series paper pieces (from Tip #1), or, use the 3×4 cards in a Memories & More pack, like the Celebration Expressions card shown here.
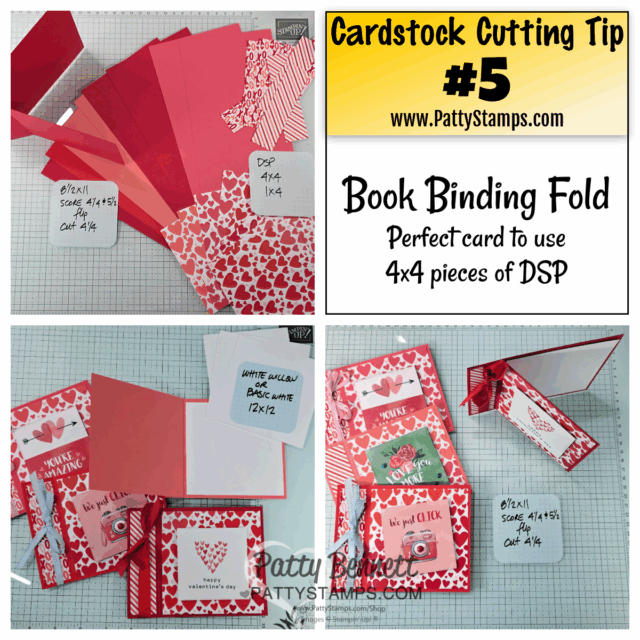
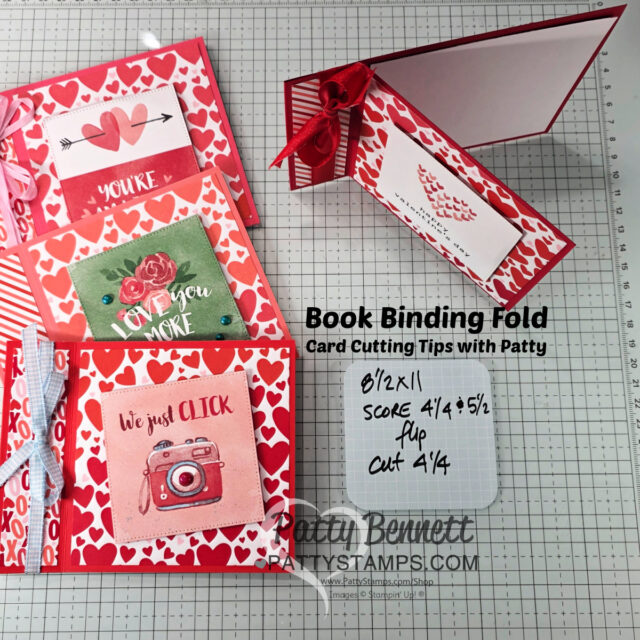
To feature your 4×4 pieces of designer paper, try a Book Binding Fold card, or, the alternate idea I shared during the video.
Watch the Cardstock Cutting Tips video
I have a list of additional cardstock cutting tips and templates to share as well… I’ll do a “part 2” video for you next month!
Want to leave a comment? Please CLICK HERE.

Watch my helpful online ordering video HERE with tips for shopping online.

New Product Reminder: the new Valentine and floral products I shared will be available starting 1-6-26.


Want to leave a comment? Please CLICK HERE.

Shop Online Anytime and Earn FREE STAMPS
SHOP and SAVE: Last Chance List
Join my Luv 2 Stamp Team of demonstrators – click for info
All my Favorites on Amazon - as an Amazon Associate I earn from qualifying purchases.
Sign Up for my Customer Newsletter
MY FREE VIDEOS tutorials
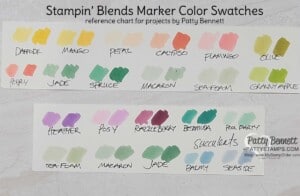

This is soooo incredibly helpful! Having the charts with the specific measurements and card sample makes it so easy to duplicate these instructions. Thank you for all of the time and effort you put into this video. 💕
Thank you.. so glad you found it helpful!!!
The paper cutting video is fabulous! Thank you, thank you, thank you! I am going to print the PDF and put it in my ideas binder.
Yay!! I’m so happy to hear it was helpful!!
Patty! These were terrific instructions for explaining how to cut card stock and dsp. I’ve been making cards for many years and have never learned this great cutting style to save paper! I’m so happy to follow your tutorials because they are extremely helpful and insightful. Thank you so much.
So very kind of you.. so happy to hear it was helpful!!
Loved this. you always give us such great ideas and have such a lovely way of presenting them. Thank you look forward to many more.
I was watching this video tonight 12/21 and really enjoyed the cutting ideas! I’ve made a lot of book binder cards but not thought about using 12×12 white to get the 9 pieces. I mass produce cards for care centers so that will be helpful. Also I happened to make several of those fold out cards for money to the grandchildren a few days ago. Thank you!
I’m so glad that was a helpful tip!!
I’m sure your grandchildren will enjoy their gifts!!!
Merry Christmas!
I was watching this video tonight 12/21 and really enjoyed the cutting ideas! I’ve made a lot of book binder cards but not thought about using 12×12 white to get the 9 pieces. I mass produce cards for care centers so that will be helpful. Also I happened to make several of those fold out cards for money to the grandchildren a few days ago. Thank you!
This has been the most helpful video I have ever seen. Thank you so much. Please, please do part 2 and 3. I can’t believe I never knew this before. Thank you.
So kind of you.. thank you!! So glad you enjoyed it!! I’ll be doing more of these soon!!
Thank you for great ideas to make multiple cards and using the paper wisely. I make dozens of cards for our senior group at church, and this will be very helpful.
These ideas on paper helps so much to remember basic card cutting however, you can make it your own with your own ideas on paper using these techniques. Awesome tutorial.
Patti, I caught a video in which you demonstrated cutting 12×12 paper – making 6 = 12 cards with a different template for each one. I think it was dated from spring 2025? I have not located it on your site. Can you help with where I can look.
I really appreciate you teaching style and clear directions!
Thank you…
THat doesn’t sound familiar.. are you talking about the 6×6 videos I’ve done? here is the latest one: https://youtu.be/jjUqyxQDJ50?si=fepjqhldqTgIuDAc
Thank you so much for the card stock cutting tip