Make a Special Birthday Banner
How fun would this be to hang this birthday banner for a friend or family member to help them celebrate their special day!?

You can make this birthday banner with Stampin’ Up! papercrafting supplies and display it any time of year for a birthday celebration at home or in the office!

Low Inventory + Sale Alert
At the time I’m typing this, the Cake Day Bundle, which I’ve used to create the cake, cookies and frosting, is on LOW INVENTORY, AND.. I’m now I’m editing this again on 11/22… it’s now out of stock for several weeks.. be sure to enter your email in the Notify Me box so Stampin’ Up! can let you know when it’s back in stock.
Oh, and the Wildflower Birthday paper I’ve featured on my birthday banner is ON SALE! I used my Party Banner Dies to die cut that paper in different patterns.


Learn how to die cut, punch and layer the Cake Day bundle pieces! You can create cards, gift tags or this banner! Watch my video!

TIP! Use the Three Banner Punch to create cute tabs to hang each banner piece from ribbon or twine! I used the middle one, it’s folded over the twine and secured front and back with Seal+.

Want to leave a comment? Please CLICK HERE.
Watch my helpful online ordering video HERE with tips for shopping online.
Sale: $13.20
Price: $16.50
Want to leave a comment? Please CLICK HERE.
Shop Online Anytime and Earn FREE STAMPS
SHOP and SAVE: Last Chance List
Join my Luv 2 Stamp Team of demonstrators – click for info
All my Favorites on Amazon - as an Amazon Associate I earn from qualifying purchases.
Sign Up for my Customer Newsletter
MY FREE VIDEOS tutorials
Gingerbread Man Free Card Video

Free Video Replay Below!
As I mentioned during my live video yesterday, this “buffet” of die cut pieces was inspired by our recent trip to a Las Vegas dinner buffet. When I came home and was playing with the Stampin’ Up! Gingerbread Man bundle, I thought of a gingerbread man buffet of all the different die cut pieces!
If you missed the live video, be sure to watch my replay below!

Crafting Tip: Make the most out of your paper… I used 12×12 Two-Tone cardstock in both Pecan Pie and Crumb Cake to die cut the gingerbread man die. When you use the die, it cuts 2 images that are linked together in the center with a score mark, so you can fold them… but you can also cut them apart (or glue the 2 halves together) to create singles.
Cutting your 12×12 into a 5″ wide strip first (on the left), then cut the remainder into two 5×7 pieces, you can fit them all into the die cutting machine and cut 3 pairs + a single.


This cute card features the Gingerbread man folded on the front of a flat card base, so he is folded on the left side and opens. Be sure to watch the video for more info on how to create it!
The background is a die cut from the Snowflake Kisses die set #166022.


You’ll notice I’ve stamped the outline image on the die cut and the easiest way to line up the stamp and the die is noted below.

Additional tips:
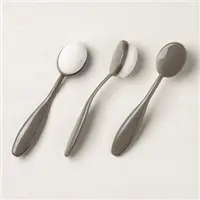
- Use a Blending Brush & ink to add color around the edges of the die cut.
- Optional: stamp the outline with Versamark ink and heat emboss in white Wow embossing powder
- Die cut the hat or scarf with the All Season Velvet paper
- Add Wink of Stella to the candy die cut pieces
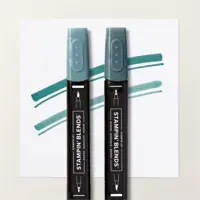
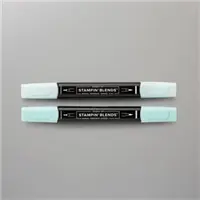
- Add some shading to the scarf with Stampin’ Blends
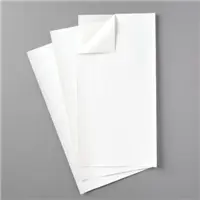
- Use Adhesive Sheets before die cutting the squiggly frosting and the candy pieces for easy assembly
- Use Peppermint embellishments for buttons


And lastly… how fun is this.. you don’t HAVE to use the gingerbread man on your project.. I just added some of the cute candy die cut pieces to an embossed wreath background, and a sentiment from the Keeping Traditions stamp set.

Watch the Gingerbread Man Card Video
If you are reading this in an email and have any trouble viewing the video, watch it on my YouTube Channel.
Supplies for today’s projects
Click any of the product photos below to shop in my online Stampin’ Up! store!
Thank you for your order!
Price: $10.00
Price: $12.50
Price: $16.50
Want to leave a comment? Please CLICK HERE.
Shop Online Anytime and Earn FREE STAMPS
SHOP and SAVE: Last Chance List
Join my Luv 2 Stamp Team of demonstrators – click for info
All my Favorites on Amazon - as an Amazon Associate I earn from qualifying purchases.
Sign Up for my Customer Newsletter
MY FREE VIDEOS tutorials
Gingerbread Man Buffet – Card Video

Inspired by our dinner buffet
We recently enjoyed a trip to Las Vegas for the Stampin’ UP! BackStage Leadership conference, and while we were there, we enjoyed a wonderful dinner buffet. So when I came home and was playing with the Stampin’ Up! Gingerbread Man bundle, I thought of a gingerbread man buffet of all the different die cut pieces!

Join me for live card making today!
Join me live on my YouTube channel at 10am PT, or, enjoy the replay later today on YouTube, or tomorrow on my blog post!
Supplies for today’s projects
Click any of the product photos below to shop in my online Stampin’ Up! store!
Thank you for your order!
Price: $10.00
Price: $12.50
Price: $16.50
Want to leave a comment? Please CLICK HERE.
Shop Online Anytime and Earn FREE STAMPS
SHOP and SAVE: Last Chance List
Join my Luv 2 Stamp Team of demonstrators – click for info
All my Favorites on Amazon - as an Amazon Associate I earn from qualifying purchases.
Sign Up for my Customer Newsletter
MY FREE VIDEOS tutorials


