
I am soooooooo excited about these cute Christmas Frame projects!! I created Christmas Home Decor framed pieces that I will display on my mantle this Christmas season! I used lots of different Stampin' Up! framelits, punches, papers, and accessories.. I hope you enjoy this blog post and VIDEO TUTORIAL as I teach you how to create your own!

You can see that I made 2 of them.. an 8×10 framed piece and a 5×7 framed piece. I had so much fun I could not stop at one!
Watch the video below for some details and to see the Stampin' UP! supplies I used.
If you are watching this in an email feed, click HERE to see the video on YouTube.
In the 5×7 frame below, I used a smaller scale design, with a smaller fireplace, and the smaller Christmas stockings from the Santa's Sleigh thinlit set.
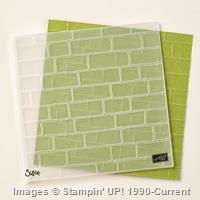
For all the details on how to create the fireplace, see the video above. I used the Hearth & Home thinlits with an inset of Brick Wall embossed cardstock.
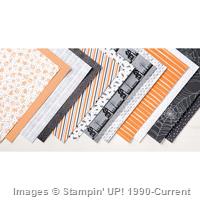
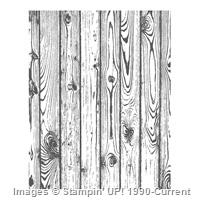
The gray brick background on both pieces is from the Halloween Night designer paper pack, and the "floor" is crumb cake cardstock stamped with the Hardwood background stamp.
I have detailed instructions in the video above for the fireplace logs as well. I stamped them with the Hardwood background stamp and did some shading and coloring to make them look like logs.

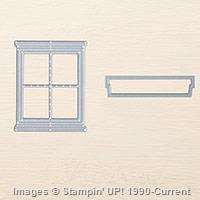
For the larger 8×10 frame below, I added the window and made the fireplace larger.

Design Note:
You could take any portion of either of these framed pieces and create a card or tag with those design elements… you could do something with the fireplace, or the tree and window.. think about ways to use these ideas separately as well.

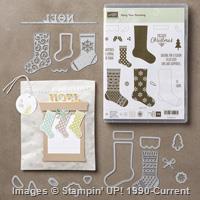
Below: These Christmas stockings are in from the Christmas Stockings thinlit die set, die cut in Cherry Cobbler, Emerald Envy and Whisper White. As you can see, I used a Project Life marker to write Mom, Dad and JB on them (for the 3 of us) :). NOEL is also found in the same thinlit die set and I placed it on the mantel. The fireplace is created with the Hearth and Home thinlits and some embossed Cherry Cobbler Bricks.

Crafting Tip:
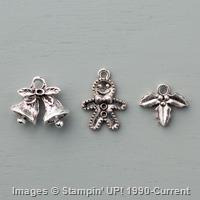
Use some heavy duty wire cutters and snip off the ring on the top of the Gingerbread man trinket so that you can add him to the Gingerbread houses! 🙂

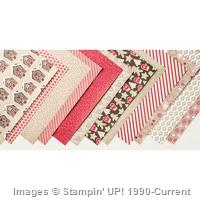
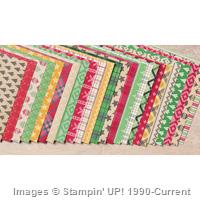
Below: Gingerbread men added to the cut out Gingerbread houses.. they are cut by hand with paper snips from the Candy Cane Lane Designer paper (part of the Buy 3 Get 1 Free offer good through 10/31/16).

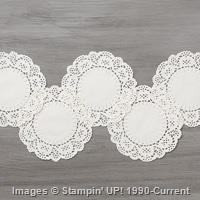
Below: the window is also created with the Hearth & Home thinlits, and I put a piece of Fancy Frost embossed paper behind it as well as the reindeer die cut. I made simple curtains by cutting some of a doily.

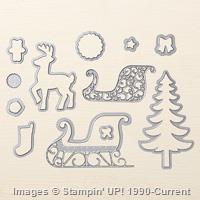
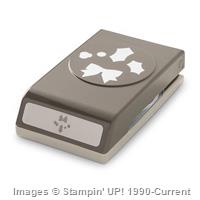
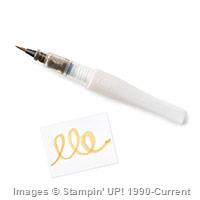
Above: the Tree is die cut from the Santa's Sleigh framelit set and the presents are all just small squares and rectangles cut from scraps from the Candy Cane Lane Designer paper. The red bows are punched using Real Red cardstock and the Holly Berry Builder punch. The tree topper start is a die cut in the Santa's Sleigh framelit set, I cut it out of Daffodil Delight cardstock and colored it with a Gold Wink of Stella pen.
Shop for Stampin' UP! supplies: You can find ALL of these supplies at the bottom of this blog post, and you can purchase them in my online store by clicking on any of the product photos.

Above: As noted above and in the video above, this 5×7 frame is just basically a smaller version of the big one.. everything is scaled down a bit. Smaller fireplace with smaller stockings, smaller presents, no gingerbread houses.
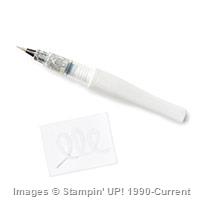
The tree is die cut using the Santa's Sleigh framelits out of a piece of the Presents & Pinecone paper, and sponged with Cucumber Crush ink and "winked" with the clear Wink of Stella… here is how I did that:


The smaller Christmas stockings on this piece were die cut from the Santa's Sleigh framelits using the Warmth & Cheer designer paper stack. The logs were stamped with the Woodgrain background stamp, and I share complete instructions for those with you in the video above in this blog post.
I hope you enjoyed this project and the video tutorial!! The frames are from the "M store" and yes, the cherry cobbler one was already distressed… great find! 🙂
Patty's Customer Appreciation Special.. limited time offer!
If you are not receiving my customer newsletter to receive special offers like this one, click here to sign up.
Click Here to download your Free Stamps with Patty form.

Need a Stampin' UP! catalog? Please Ask!
Want to place an order? Click to shop in my online Stampin' Up! store 24/7!
Or CLICK any of the product photos below to shop in my online store for that item.


Shop Online Anytime and Earn FREE STAMPS
SHOP and SAVE: Clearance Rack - Promotions
Sign Up for my Customer Newsletter
Patty's FREE VIDEO tutorials


Oh my Patty,,,, These are ADORABLE.. I LOVE the pictures and yes I want to make one……… I can never think about combining stamp sets to make anything. I really love these…. Thank you so much for the video and showing your gorgeous pictures.I am in love with these…….You need to make more pictures with other sets after christmas. I would hanging them all over my house,lol,,,,,,,,, Just GORGEOUS,,,,, Thanks so much for all you do. You are AMAZING Patty. Have a great weekend.
WOW!!! Patty these are soooo, cute. TWO THUMBS UP. Awesome video. Great description on how to make the logs. Yes, I will be making some of these for my family and friends. Have a good weekend.
Great video Patty! I loved all the tips. These two framed pieces are amazing.
Absolutely adorable! You are so creative. Thank you for sharing your video with tips! You are so very generous!
LOVED those! Such great tips and ideas! AMAZING! Enjoy your videos too! Thanks for sharing!
You are so creative! Thank you for sharing, it very helpful to see how it is done not just the finished product.
Thanks for your SUPER ideas…I’ll start making my Christmas presents for family and friends NOW!!!!
What an inspiration you are to me. I haven’t been stamping all that long, but I love it and you are so helpful. These frames are just awesome and I thank you for all your wonderful ideas and I so appreciate the great thank you cards you sent to me, just another spectacular thing you do.
They turned out really cute. The little touches like your names on the stockings were a nice touch. TFS