
If you follow me on Facebook, you probably saw the fun pile of pine wood boards that my neighbor left by my front door. Many of you asked what I was going to do with them? Well, they are for the backgrounds of my blog post projects!!
HOWEVER, I came across a little issue…. the pine is so "yellow" that it fools my camera and it makes all the photos really yellow, which require a ton of photoshoping to make them look better.. so.. I decided to buy some paint and start painting and distressing the yellow-ish pine boards to make them look more interesting and a little bit like they'd been weathered for a long time!

The boards were single left over pine planks from who knows what project.. and my neighbor (handy-dandy woodshop neighbor) glued them together into larger pieces.. he sanded them and did the beveled edges on them too!! It's so great to have handy friends!!!! 🙂
You can see from the photo below, that the pine boards I found in our garden shed, are quite yellow, and after my "distressing process" I managed to make them all look totally different!


I really should have looked on Youtube before I started this process, but I just dove right in with some bottles of acrylic paint, old paint brushes, an old toothbrush, foam brushes, sand paper and old rags.
It was about a 3 day process as I was trying to get the house decorated for Christmas at the same time, and couldn't devote all my time to this project.
My (totally amateur) process to distress the wood:
- start with a wash of paint (acrylic paint watered down) and applied with a foam brush
- sand when dry
- add a 2nd color the same way as #1
- sand when dry
- add a 3rd color with a very dry paint brush to give the appearance of wood grain (with a light touch)
- sand when dry
- evaluate… like it? stop! needs more color? (probably!) 🙂 add more colors either as a wash or with a dry paintbrush
- add paint speckles or streaks with the toothbrush dipped in paint
- distress wood with wire brush, coarse sand paper, or anything that will rough it up a bit
- apply more paint
- sand again
- ya, you get the idea… you could do this for days…. I had to make myself stop!
Notes:
For the blue ones, I started with white paint and added blue, then added more white
For the light ones, I started with white paint and added hints of gray, black and brown (with a very dry brush)
For the dark ones, I started with brown paint, and added white, gray and black paint
On some of the boards, I dipped my rag into water then into paint and kind of washed over the boards.
I basically experimented with every possible combination I could think of. 🙂


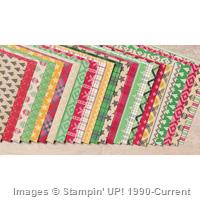
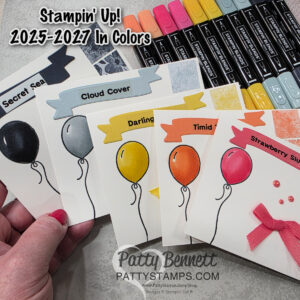
When I am ready to photograph my craft projects, I place them on a board and take photos, as you can see below:

I experiment with different boards depending on the color and size of the project, then crop the photo and add my watermark as shown below.


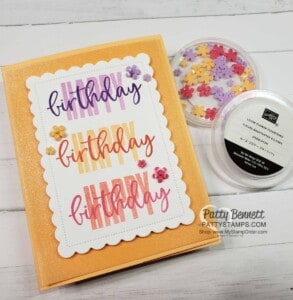
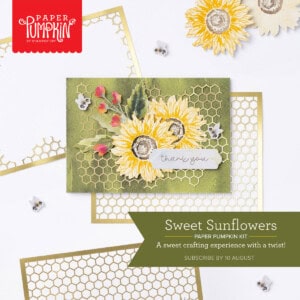
Above and below:
Examples of different wood backgrounds for my Merry Medley Christmas gift bag projects.
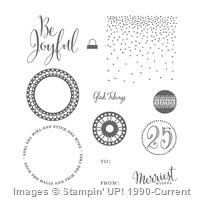
I stamped the Kraft gift bags with my Merry Medley background stamp and decorated them with some Warmth & Cheer designer paper for easy and fun holiday gift bags!

Thank you for visiting with me today!
Need a Stampin' UP! catalog? Please Ask!
Want to place an order? Click any of the product photos below to shop in my online Stampin' Up! store 24/7!


Well, your work paid off because those are beautiful backgrounds for your beautiful projects! You really put a lot of time into making your blog a welcoming, fun place to visit, Patty!
Good morning Patty,,,,,,,, You did a wonderful job on the pine boards and lots of working making them nice……..I always LOVE seeing your blog every morning….. Thanks soooo much for all you do. I can’t tell you that enough…… Have a great day Patty
WOW! What a difference a little paint does. I love all the different colors. Very nice.
What a great neighbor to give you all these back grounds to work with. That neighbor is keeper for sure. You did a super job on the wash effect. Really like them. Have a Merry Christmas and Happy New Year.
Deloris
Wow, Patty, lovely distress job. I love the colours you chose and they make for a nice back drop indeed.
Beautiful and clever re purposing and recycling! I totally love it and everything you put on there will look fantastic!