
Make the most out of your 12×12 paper and create 9 split cards with one 12×12 sheet of designer paper!
Watch the Split Card Video! Be sure to scroll down and watch the video to see how I made these cards and more!

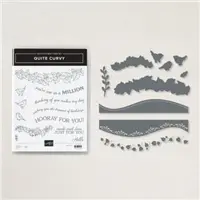
There are 2 easy ways to create a split card. You can use a fun curvy die like the one in the Curvy Dies set, or, you can cut with your Paper Trimmer or snips. I have demonstrated both ways in the video below in this post. Today’s post features the cards that have been die cut using the Curvy Dies. Tomorrow I will showcase the cards that were cut with the Paper Trimmer.

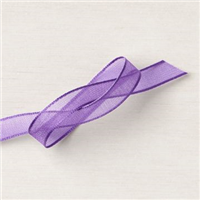
Above: cut a 4×4 square of Hydrangea Hill designer paper, die cut it with the curvy die, and split it apart to create a split card. I layered it onto a piece of 4″ x 5-1/2″ designer paper from the Hydrangea Hill paper pack and then onto a Highland Heather top fold card. Gorgeous Grape ribbon was used to tie around the card. Stamp the birthday greeting from the Quite Curvy set in Gorgeous Grape ink.

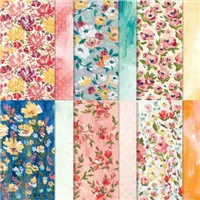
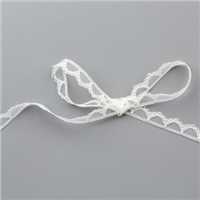
Above/Below: Top fold Petal Pink cardstock base with Fine Art Floral designer paper die cut with the Curvy dies. I fussy cut some flowers from the Fine Art Floral paper to add as a focal point, and added Scalloped Lace ribbon that I colored with my Old Olive Stampin’ Blends marker.

Bundle Savings!
Did you know that you always save 10% on Stampin’ UP! bundles? Check out the Quite Curvy Bundle HERE.
Below: Top fold Pretty Peacock cardstock base with Fine Art Floral designer paper die cut with the Curvy dies. I layered it onto a piece of 4″ x 5-1/2″ piece of Basic White Cardstock, and then onto the top fold card. White ribbon from the Flowers for Every Season pack is tied around the card. Stamp the thinking of you greeting from the Quite Curvy set in Pretty Peacock ink.

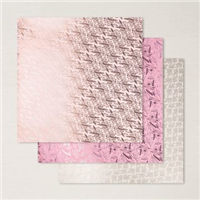
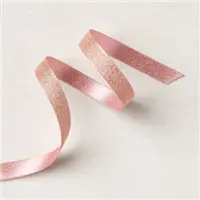
Below: Top fold Petal Pink cardstock base with Love you Always Specialty designer paper die cut with the Curvy dies. Stamp the thinking of you greeting from the Quite Curvy set in Rococo Rose ink. Fussy cut flowers from the Fine Art Floral pack to add to the card, and Tie the Blushing Bride metallic ribbon around the card.

Watch the Video!
If you are reading this in an email, please CLICK HERE to watch this video tutorial on my blog, or HERE to watch it on YouTube.
Want to leave a comment? Please CLICK HERE.

Watch my helpful online ordering video HERE with tips for shopping online.


Want to leave a comment? Please CLICK HERE.

Shop Online Anytime and Earn FREE STAMPS
SHOP and SAVE: Last Chance List
Join my Luv 2 Stamp Team of demonstrators – click for info
All my Favorites on Amazon - as an Amazon Associate I earn from qualifying purchases.
Sign Up for my Customer Newsletter
MY FREE VIDEOS tutorials


Thanks Patty. I have followed your posts for years and find them helpful.
Thank you Sandy, for your kind comment!
Good Morning
Enjoy all your videos. On your paper trimmer you have a yellow strip like a ruler. Get Idea. Where did you get that.
I added that to the paper trimmer. If you search for reverse self-adhesive ruler on Amazon you will find it.
It is amazing your resourcefulness. Love the ideas of using the curvy dies or cutting at a diagonal. Have used the 4 inch cutting for mass producing as well as the 3 inch. Your colors are beautiful combinations that really show case our beautiful dsp. Thanks for sharing your fabulous creativeness!
Thank you for such a kind comment!!! 🙂
Thank you for all the information you give. I would of never thought of cutting the paper as you did to save paper and make more cards. Always look forward to your postings.
So glad you liked it! Just something a little different 🙂
LOVE this great tip on the way you cut the DSP. I send out a lot of cards to family and friends. Good way to use my DSP.
Thank you Patty !! It will keep me busy for sure.
So happy the idea will work well for you!!
Has the celebrations mini catalog came out yet
Yes, Sale-a-Bration started on Jan. 5, and the Jan-June 2021 catalog started the same day. You can see all the details here: https://www.pattystamps.com/2021/01/new-2021-catalogs-starting-january-5th.html
Hi Patty,
I’m catching up on your blog. I really love this idea… I’m going to do this because I have soooo much DSP and this is perfect . Thanks for the video. Have a great day
So glad you enjoyed the idea!
Thanks for sharing your tips,I’ll feel more confident using the dsp paper now ✨🤗
So glad you enjoyed it Jan!
Enjoy your cards. Adrienne B from Newport n h
Thank you Adrienne!
Patty –
love your ideas, instructions and kind way that you present your videos. May God always bless you with kindness and love.
Thank you Marie! So sweet of you!!