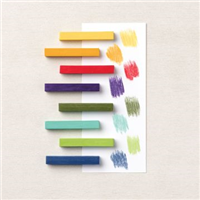
I hope you enjoyed learning and exploring ways to use the Stampin’ UP! Soft Pastels during my weekly Facebook Live video tutorial yesterday!! If you missed it, never fear, the REPLAY is below and as always, all videos are also archived on my Business Facebook Page and my YouTube Channel!
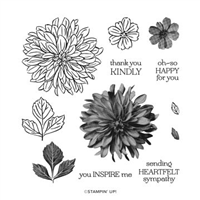
Because I LOVE the Delicate Dahlia’s stamp set (a free Sale-a-Bration gift choice from Stampin’ Up! through 9-30-21), I decided to use it to create my cards while experimenting with the Soft Pastels Assortment.
Limited Time Offer!
Sale-a-Bration 2021 “Part 2” is only valid through 9-30-21, so don’t delay if you want this Delicate Dahlias set.. it’s a free gift choice with your $100 online order! See more about Sale-a-Bration Part 2 HERE.
Above & Below: I inked the “filler” (more solid) Dahlia image with Versamark ink, stamped it onto a Basic White Scalloped Contour die cut, then pounced the Pastel powder onto it with a Sponge Dauber. Please be sure to watch the VIDEO below in this post for the tips and details for this technique! You’ll want a silicone mat and a way to scrape the pastel “stick” onto the mat to create a powder. Trust me.. it will make sense when you watch the video. The greetings on both cards are found in the Shaded Summer set.
I used the Coastal Cabana, Night of Navy and Granny Apple Green pastels for the image above, mounted it onto Pacific Point cardstock and added a layer of Ombre Specialty (glitter) paper in between!
On the card above, since we are throwing it all the way back to 2009 with this “Poppin’ Pastel” technique, I also used the corner rounder on my layers to remind me of all the cards with rounded corners “back then”. 🙂 My base card is Poppy Parade, and the middle layer is Mango Melody Ombre Specialty (glitter) paper. Pastel colors used: Daffodil Delight, Mango Melody, Poppy Parade and Granny Apple Green.
Exploring Ways to use Soft Pastels:
Let’s look at other ways I used the Soft Pastels assortment
I’ve covered each of these techniques in the video below, but if you want photos for reference:
Above Left: Stamp an outline image with Versamark ink, while wet, use a sponge dauber to apply Pastel color. I scraped some of the pastel dust/powder onto a silicone mat, then pounced the dauber into that pastel dust – (see the video below).
Above Right: Stamp a solid image with Versamark ink, while wet, use a sponge dauber to apply Pastel color. I scraped some of the pastel dust/powder onto a silicone mat, then pounced the dauber into that pastel dust – (see the video below).
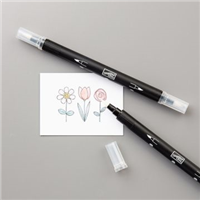
Above Left: Stamp an outline image with black ink (I used Memento), then tip the tip of a Blender Pen into the Soft Pastel, picking up color, and color as if you were using a marker.
Above Right: Stamp an outline image with black ink (I used Memento), then use a sponge dauber to apply Pastel color. I scraped some of the pastel dust/powder onto a silicone mat, then pounced the dauber into that pastel dust – (see the video below).
Above Left: Stamp a solid image with Versamark ink, while wet, use a sponge dauber to apply Pastel color. I scraped some of the pastel dust/powder onto a silicone mat, then pounced the dauber into that pastel dust – (see the video below). Then stamp outline image on top in black ink.
Above Right: Stamp an outline image with black ink (I used Memento), then apply Soft Pastel Color direct to the paper with the Soft Pastel sticks. I used my sponge daubers to “set” the color.. just pounced it onto the image after coloring with the pastel sticks.
NOTE: on ALL of these techniques, when done adding color, I tapped off any pastel dust, then used a tissue to softly dab the images and gently whisk away any left over powder or loose color.
Watch the Video:
If you are unable to watch the video in an email, please feel free to click to watch it on my PattyStamps blog, or YouTube Channel.
Want to leave a comment? Please CLICK HERE.
Watch my helpful online ordering video HERE with tips for shopping online.
Want to leave a comment? Please CLICK HERE.
Shop Online Anytime and Earn FREE STAMPS
SHOP and SAVE: Last Chance List
Join my Luv 2 Stamp Team of demonstrators – click for info
All my Favorites on Amazon - as an Amazon Associate I earn from qualifying purchases.
Sign Up for my Customer Newsletter
MY FREE VIDEOS tutorials







Hi Patty,
I have not used these. Love your videos.
Marilyn
I love these chalksI wasn’t sure how to use these. Thanks a lot for sharing.
thank you so much Patty! I’ve had my pastels for a little while now and wasn’t quite sure where to start. You’re great video and all the hints and tips were just what I needed to inspire me!
I love watching your videos
very interesting demo of the pastels. I have the old style squares pastels & to use them dry I sometimes pick up the color with a qtip & apply the color to the card. mostly I use them wet. I find them good for mixing colors to create a new color.