

These beautiful watercolored pine trees are super easy to make! I hope you will enjoy the quick 5 minute Evergreen Forest Embossing Folder Watercolor tutorial video at the bottom of this blog post!! You can make your own Christmas cards using all the supplies at the bottom of this post, and the instructions in the video!
I originally saw an idea similar to this by Su Mohr on pinterest, and I added the watercoloring step and a couple other design elements. Thanks Su, for the inspiration!!

I’ve shown all the steps in the video below, but the basic steps are:
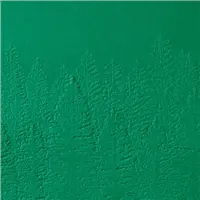
- Emboss watercolor paper with the Evergreen Embossing folder
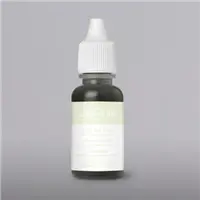
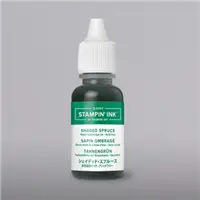
- Add watered down ink with the Water Painter and Stampin’ UP! reinker
- Sponge extra color on the raised areas with Sponge Daubers
- Spritz with Frost White Shimmer paint
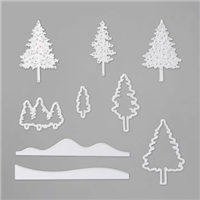
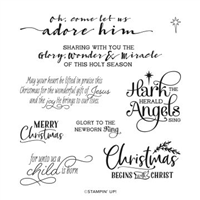
- Die cut with the Scalloped rectangle from the Stitched so Sweetly dies, assemble on Thick Whisper White cardstock with a doily, greeting and die cut Pine Wood tree die

Above: watercoloring the raised, embossed Evergreen Forest embossing folder image with Water Painters
Below: adding more ink to raised area with sponge daubers


Above & Below: die cut watercolor paper with the Stitched so Sweetly dies


I used Thick Whisper White cardstock for my base card, and for the Merry Christmas die cut. The tree is die cut from an extra piece of watercolored, embossed tree paper. Self-adhesive sequin snowflakes finish off the card.

Watch the QUICK video!
If you are reading this in an email, you can view the video on my blog HERE.
Want to leave a comment? Please CLICK HERE.

Watch my helpful online ordering video HERE with tips for shopping online.


Want to leave a comment? Please CLICK HERE.

Shop Online Anytime and Earn FREE STAMPS
SHOP and SAVE: Last Chance List
Join my Luv 2 Stamp Team of demonstrators – click for info
All my Favorites on Amazon - as an Amazon Associate I earn from qualifying purchases.
Sign Up for my Customer Newsletter
MY FREE VIDEOS tutorials


I can’t find the fast motion video
coloring the tree, all I see is the one where you mention the shimmer for spritzing can you send me a link please.
noflurn@gmail.com
Yep, that’s it.. 1/2 of the video is the fast motion video. Hope you enjoy it!
Love this technique! Awesome to get unique coloring each time. Thanks for sharing the tip about alcohol and water containers. As always your cards are fabulous1
You are most welcome. I don’t think I even said what those containers are.. they are hair color applicators. I’ve shared them in several other videos, and just love them!
Great cards.
Thanks Judy!
Beautiful and festive! Thanks for the video and blog post.
Thank you Lisa!
Thank you for this great tutorial. The video made my head spin. Wish it was in regular motion. I was trying to figure out which color of green you started water coloring with, then hitch colors you sponged with.
Hi Nancy, I did light to dark on the refills – you can see them listed in the product gallery at the bottom of the post, and then the 2 colors of ink pads listed are the 2 I used for sponging. I hope that helps?
Perfect. Thank you very much. Have a great day and stay safe.
Loveeeeeeeeeee this so much!!! How do Me and My MOM grab one of our own?
So glad you liked the ideas.. you can purchase all of the supplies here in the post.. click the product photos above
Absolutely LOVE those cards. I also love “easy” cards that are quick to put together and, in this case, easily multiplied. Thank you for sharing your talent!
Thanks for watching Deb.. I am so happy you enjoyed it!
So AWESOME, thank you – can’t wait to start playing.